

IPTV lists are a great way to watch Internet TV. They are available in the form of files or M3U links that you only have to add to an application to be able to play them. If the application you are going to use is Kodi, the steps to follow to open or view an M3U list are very easy . You will have to do almost the same thing that we explained in the tutorial on how to watch DTT from Kodi. Anyway, right away we will teach you step by step what you need to do to view an M3U playlist on Kodi.
How to Open or View an M3U Playlist on Kodi: Step by Step

First of all, do you already have the M3U list you want to watch on Kodi? If not, you can use these two that are free and legal : IPTV.org list and TDTChannels lists . Once you have the M3U file or list in your possession, do the following to open it in Kodi:
- Go into Kodi .
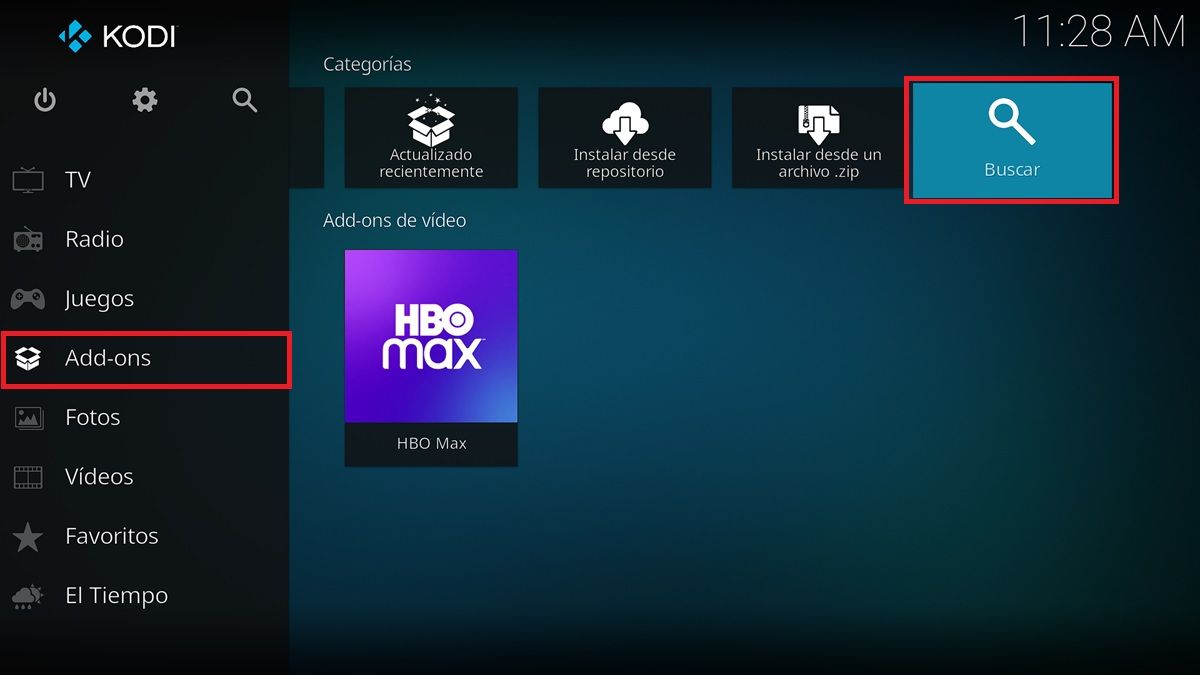
- Go to the Add-ons option.
- Then click Search .
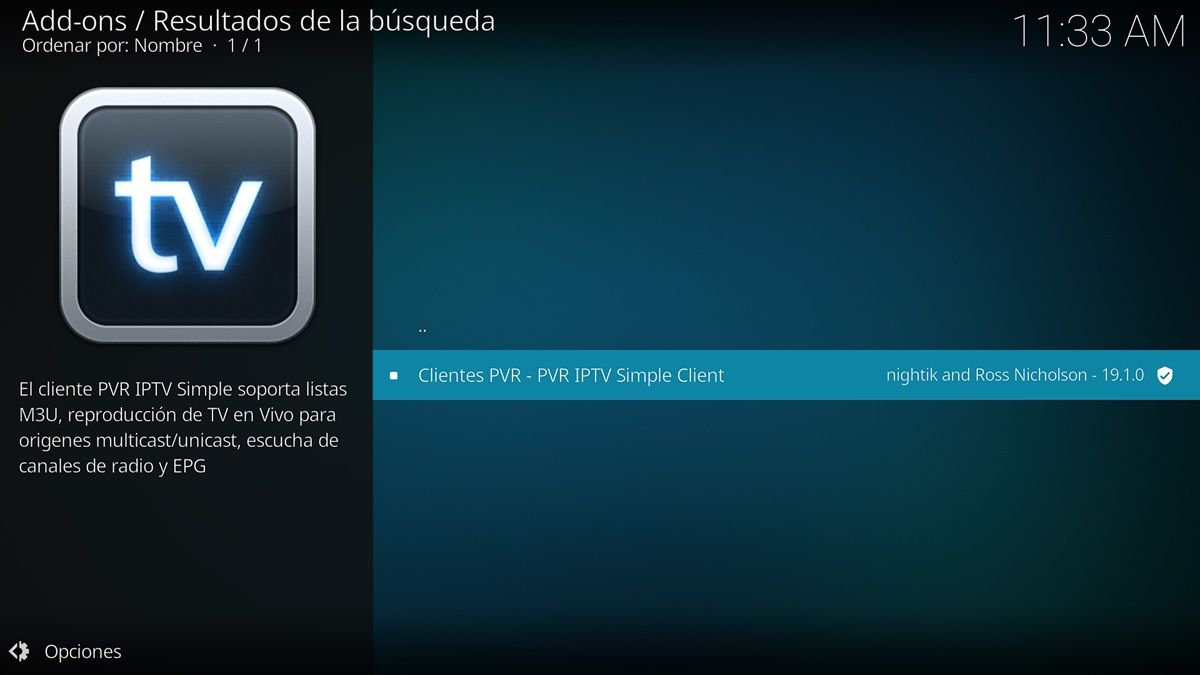
- Enter ” PVR IPTV Simple Client ” and click on the Kodi add-on that is named just like that.
- Now tap the Install button, tap OK when prompted to install some plugins, and wait for everything to install.
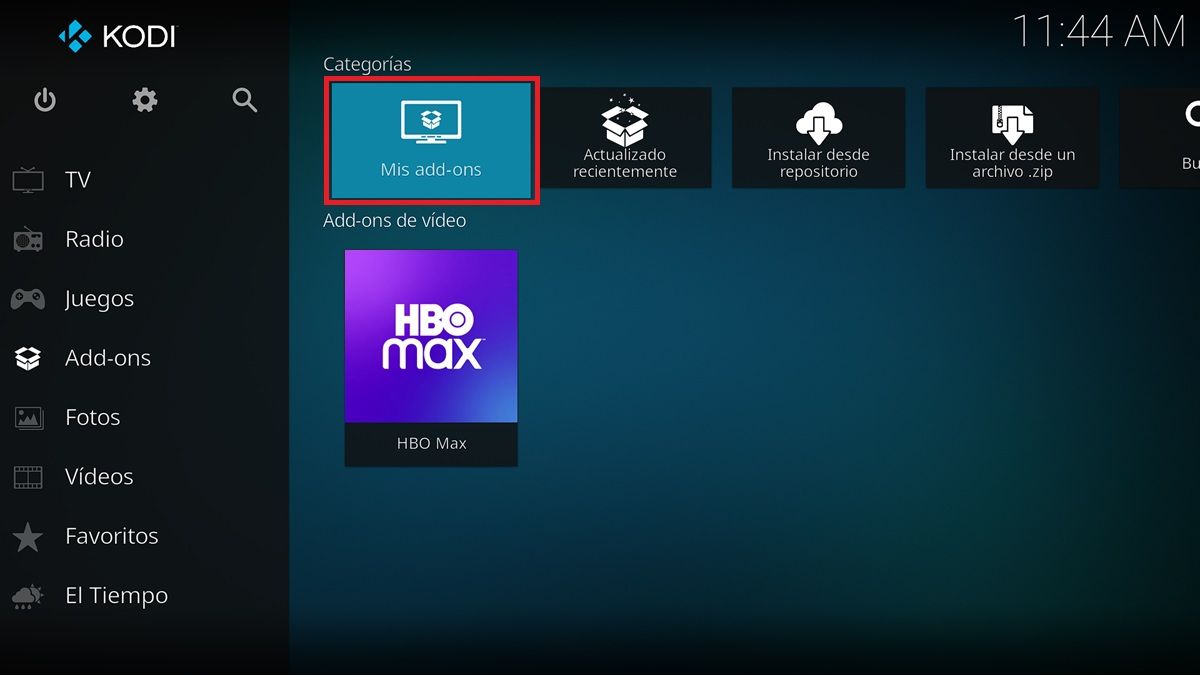
- Once installed, go back to the Kodi main menu and from there go to Add-ons.
- Select My Add-ons .
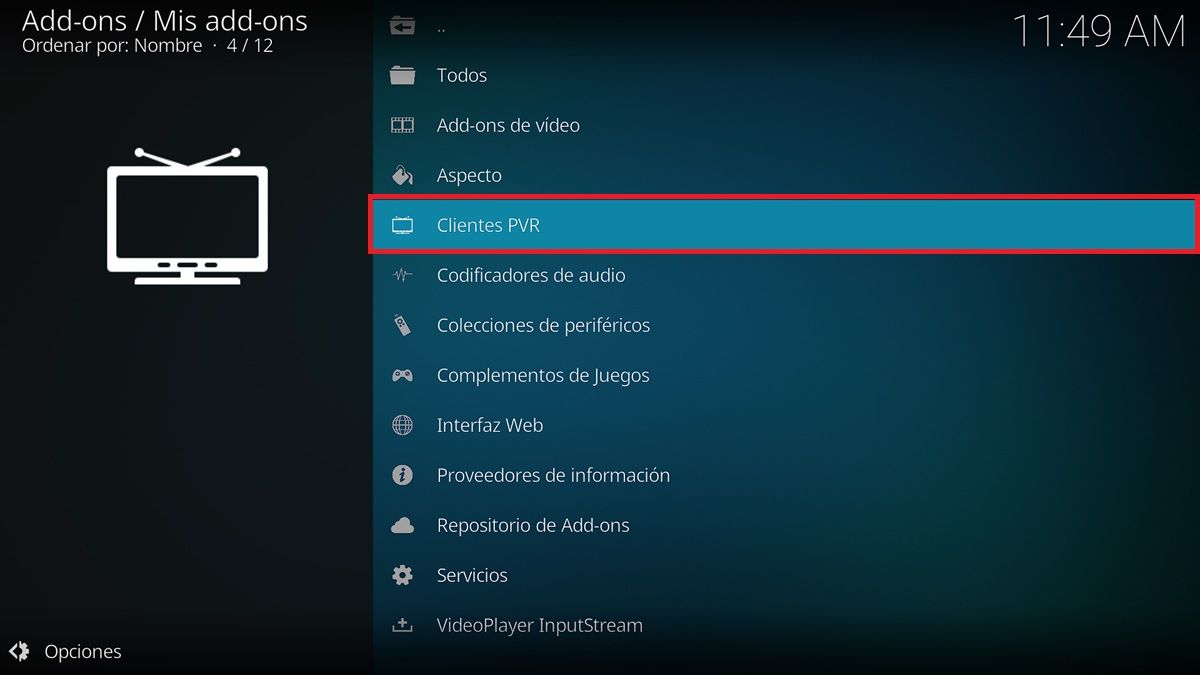
- Choose PVR Clients .
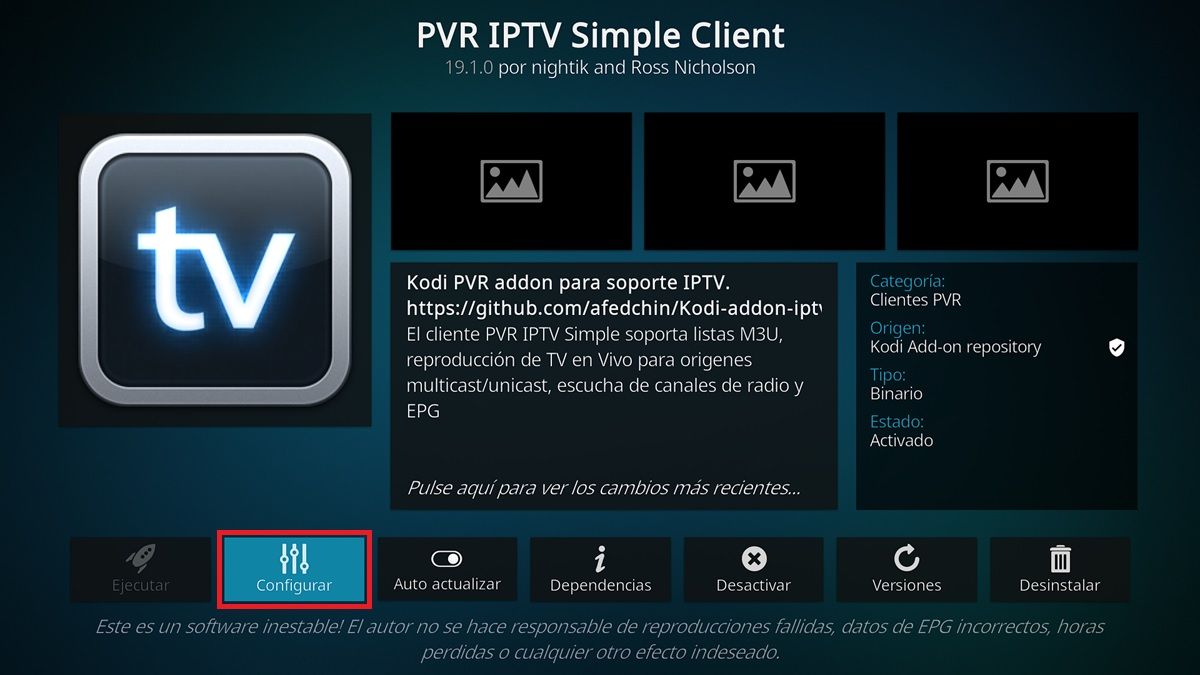
- Go to PVR IPTV Simple Client and click on Configure .
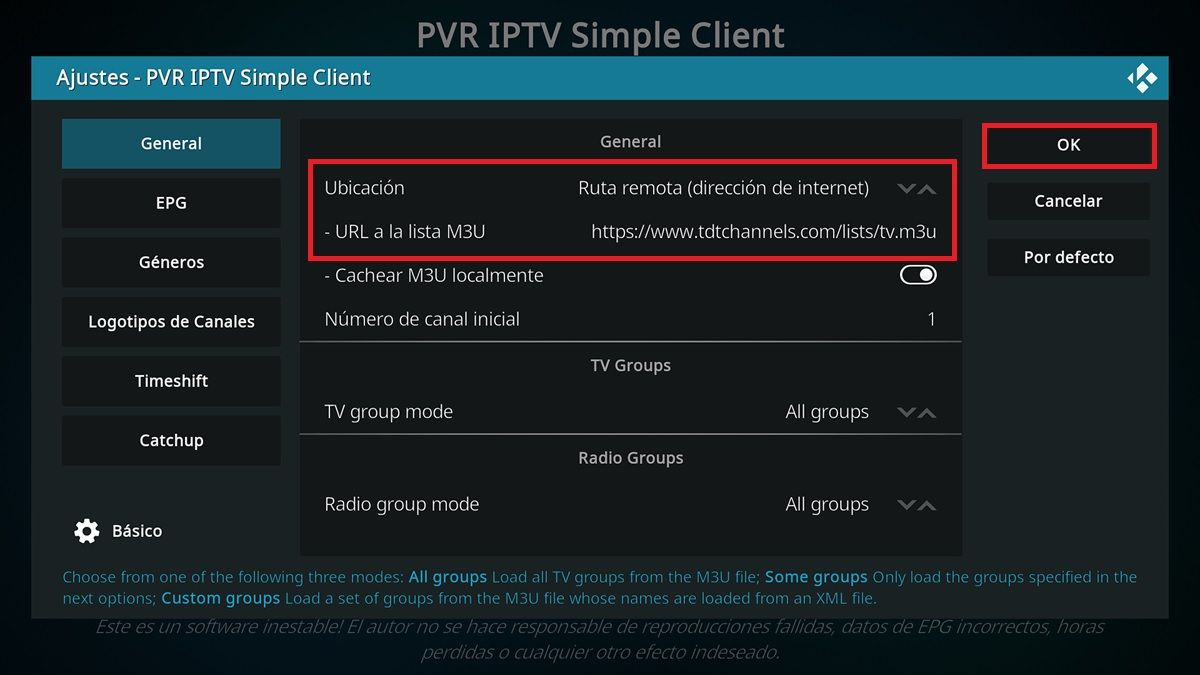
- In the General tab, choose the M3U List Location by pressing the arrows.
- If you have an M3U file, select “Local Path”.
- If you have an M3U link, choose “Remote Path”.
- Tap the option below Location to select the M3U file or enter the URL of the M3U playlist .
- Afterward, tap Ok and return to the Kodi main menu.
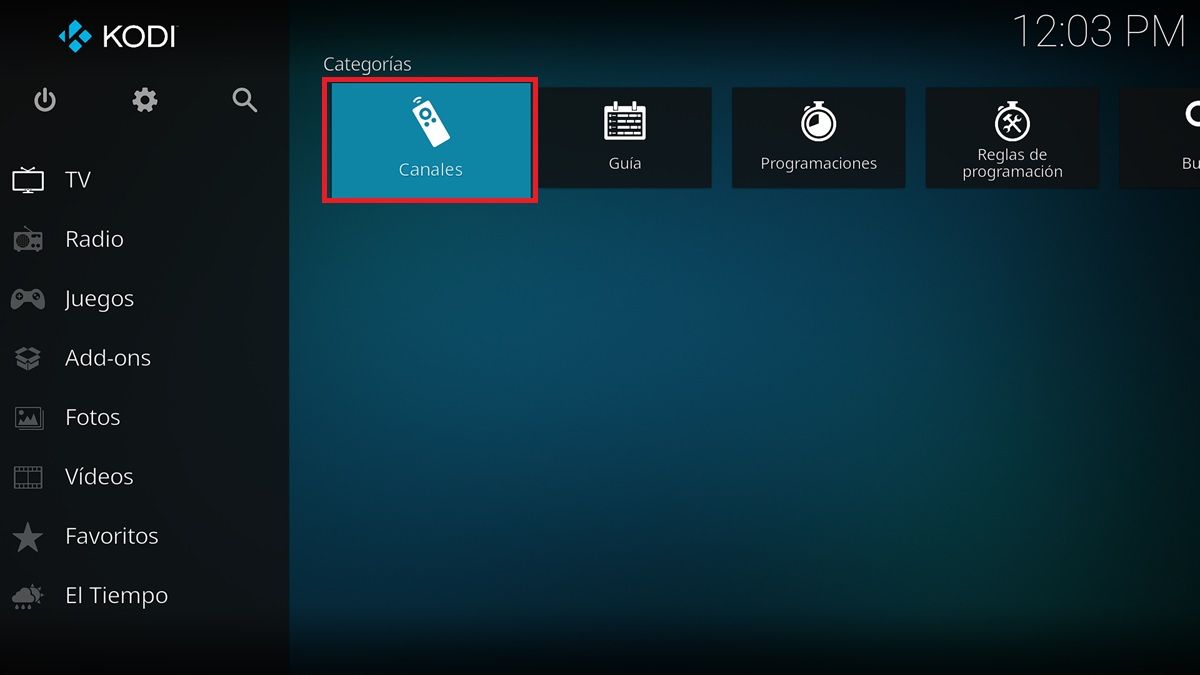
- Go into TV and then go into Channels .
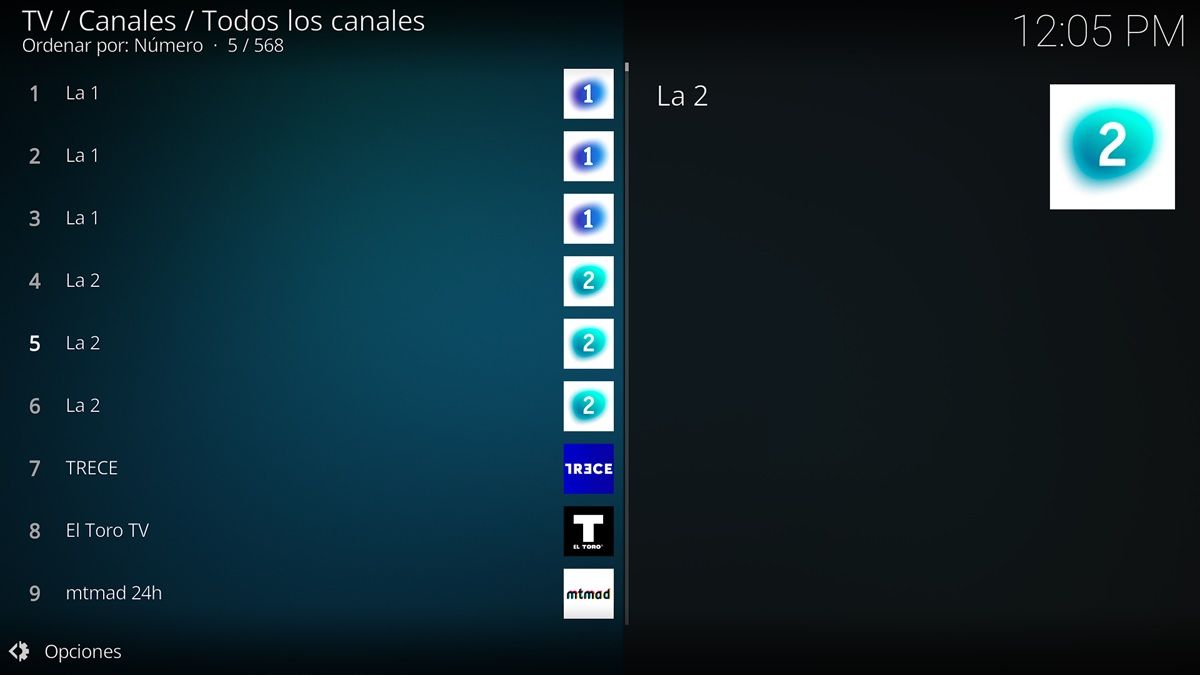
- There you will see all the channels of the M3U list that you just configured. Open the channel you want and enjoy.
Ready! As you will see, there is nothing difficult about viewing an M3U list on Kodi. By the way, this tutorial works on all platforms Kodi is available on : Android, Windows, Linux, iOS, etc. We hope it has been useful and if you need more help, do not hesitate to leave us a comment.
