

Now that Android 13 is reaching all the latest generation mobiles, why not install it on your computer or laptop too? It is very likely that, if you do not have a high-end smartphone or a powerful mid-range smartphone from the last few years, you will surely never receive Android 13 officially . Fortunately, you can try all the new features of this latest version of Android right on your Windows 11 or Windows 10 PC to see if it’s worth your while.
With Android 13 on your PC you will be able to determine if it is worth buying a new mobile with this version of Android, test applications, play Android games and much more… We already warn you that the method that we will show you here to install Android 13 on Windows it doesn’t actually install the operating system to the storage. Actually, what we will do is emulate it through the official Android emulator (Android Studio). It is the easiest way to use Android 13 on PC without much hassle.
Requirements to install Android 13 on Windows 10 or 11
Before seeing the procedure to install Android 13 in Windows, you must make sure that you meet the minimum requirements to do so:
- Windows 8/10/11 64 bit .
- Screen with 1280 x 800 resolution.
- CPU with x86_64 architecture (Intel Core 2nd generation or better / AMD that supports Hypervisor).
- 8 GB of RAM or more.
- 12GB of storage . Required to install: IDE, Android SDK and Android Emulator. Android 13 will take up a little more.
Any mid-range or low-end PC with a decent amount of RAM can emulate Android 13 without issue. If your computer has an SSD, even better , as it will make everything work faster. With an HDD, the performance will be so unacceptable that you probably won’t be able to emulate Android 13 properly.
How to install Android 13 on your Windows 10 or 11 PC
To install Android 13 on your Windows 11 or 10 PC there are several steps you need to follow. Here we have prepared a step by step guide so that you will not find it difficult to install the emulator and the operating system itself.
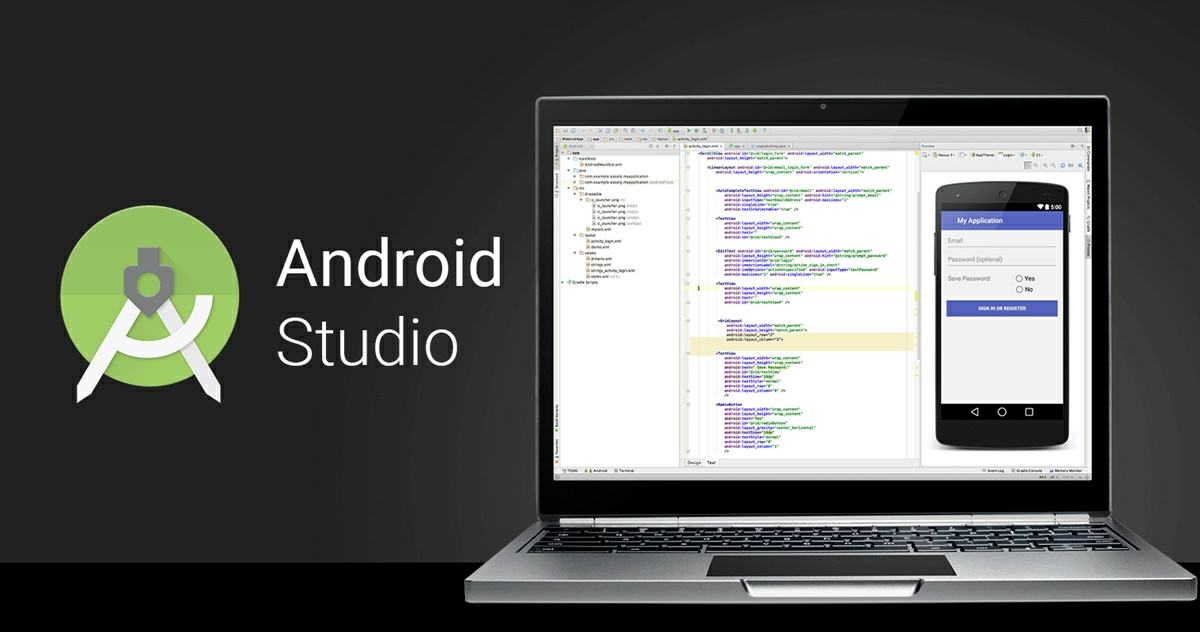
Install Android Studio on Windows
Android Studio really is a tool for Android app and game developers . It comes with a built-in emulator that is quite useful for testing all the features of the operating system, which is why we will install it in this tutorial. To do this, do the following:
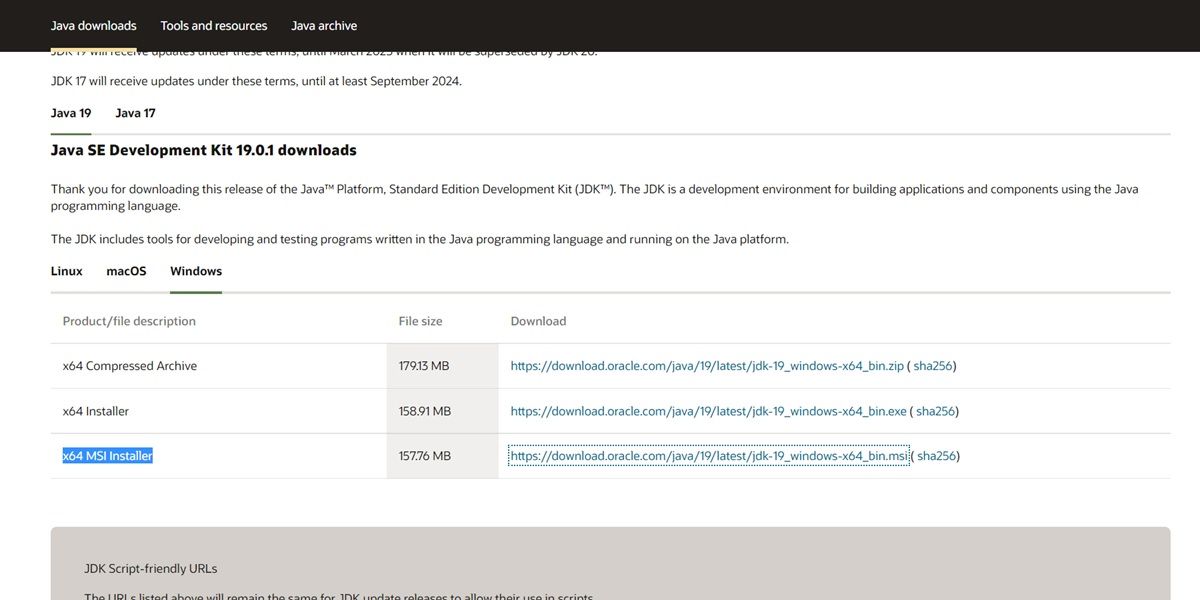
- Go to the Oracle Java JDK website on your PC.
- Download the x64 MSI Installer version of the Java Development Kit and install it on your PC.
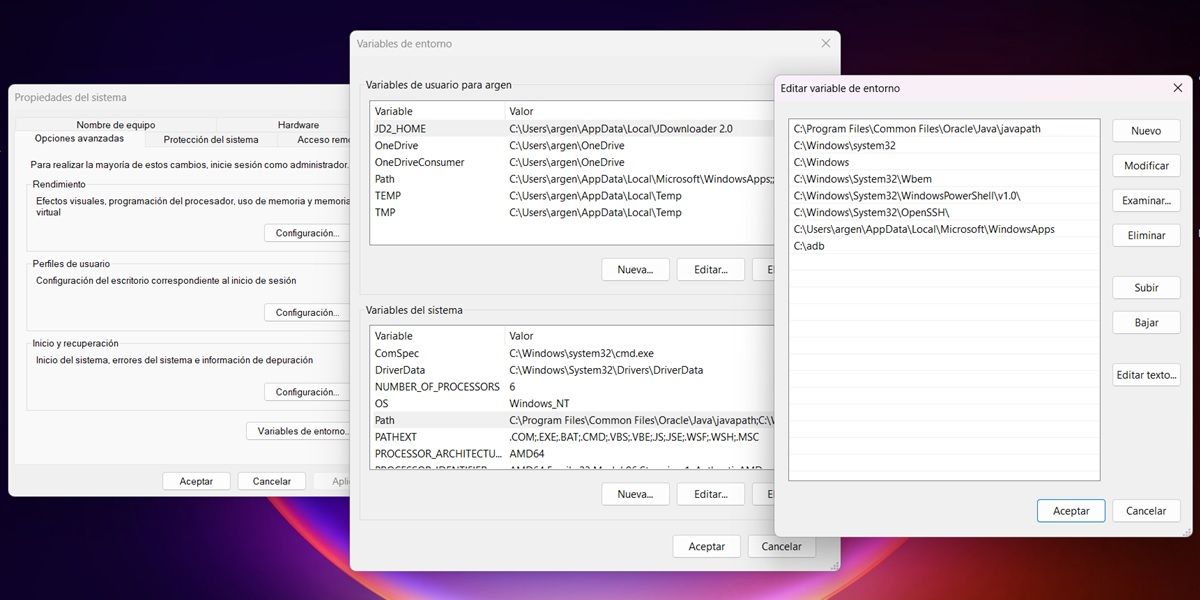
- Look in Windows for the option ” Edit system environment variables ” and select it.
- Click on Environment Variables .
- In the “System Variables” section, click on Path , then tap on the Edit button and finally copy the path of the folder where the JDK binaries are installed. For example, in our case, the path is C:/Program Files/Java/jdk-19/bin
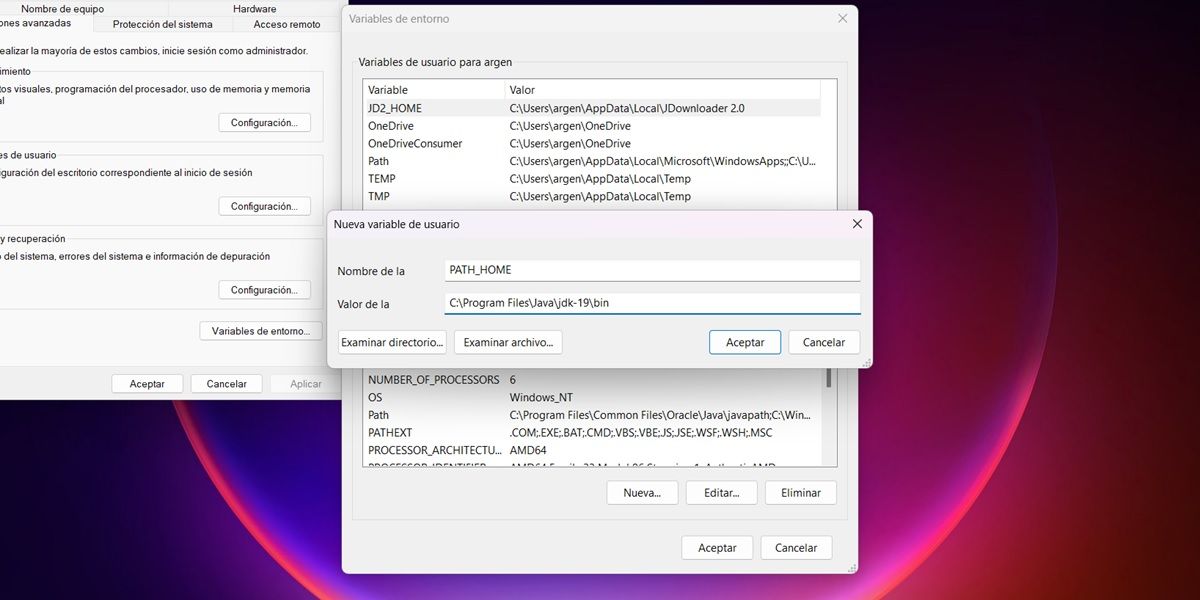
- Go back to the “Environment Variables” window and in the “User variables for…” section press the New button.
- In “Name of” enter PATH_HOME and in “Value of” paste the path copied before . Click OK to save the changes.
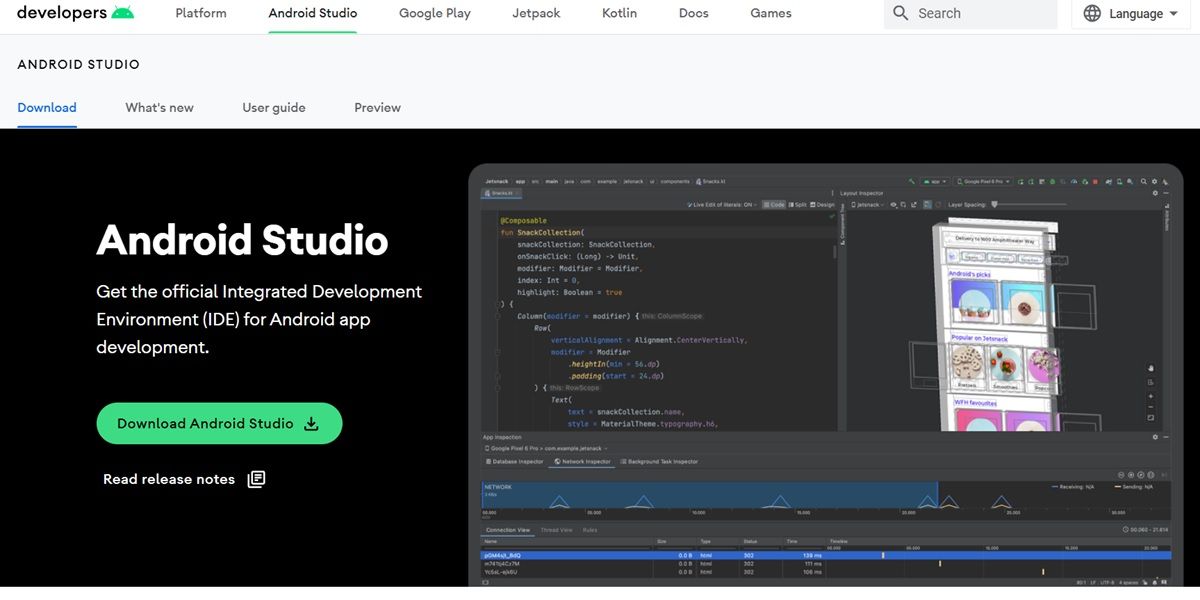
- Now yes, your PC is ready to install Android Studio. So head over to the Android Studio official website and hit the Android Studio download button. You will have to accept the terms and conditions to hit the download button for real.
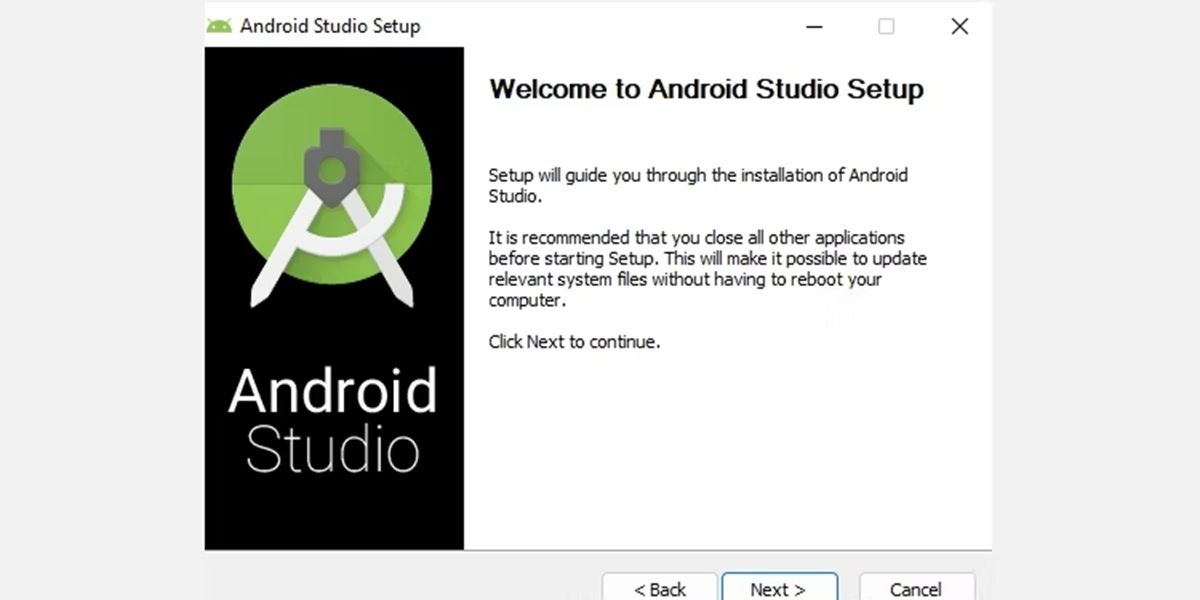
- Double-click the Android Studio setup file and follow the steps provided. We recommend you install it without modifying anything during the process, as it is not necessary.
That is all! In this way, Android Studio will be installed on your PC and you can use it to emulate Android 13. How? We’ll explain to you right away.
Install Android 13 from Android Studio
To emulate Android 13, you need to download and install it from Android Studio like this:
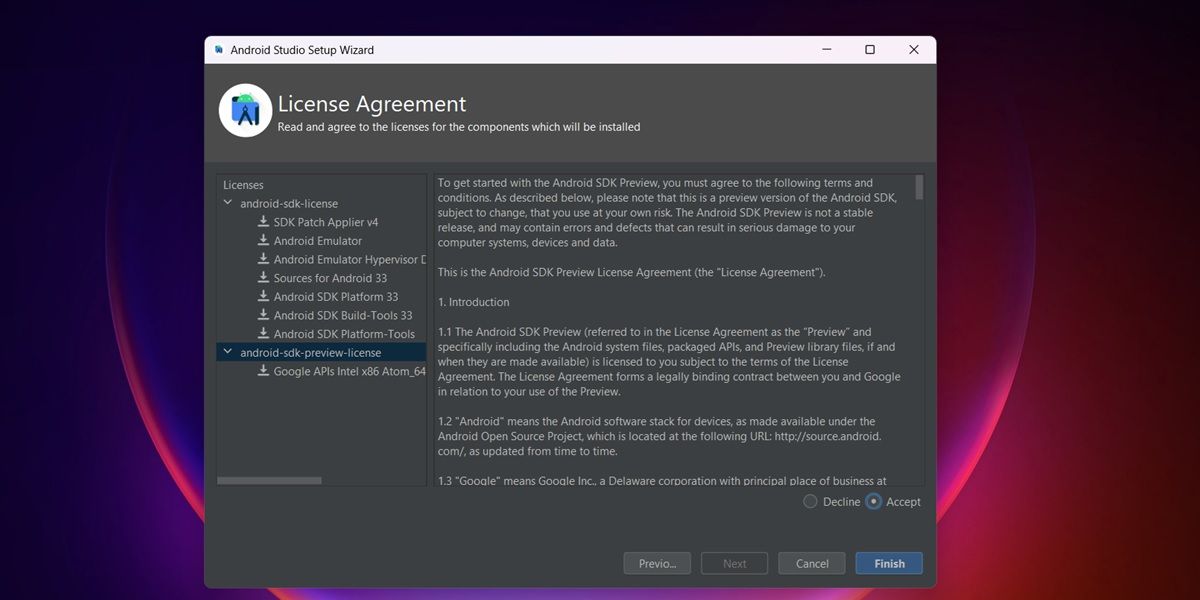
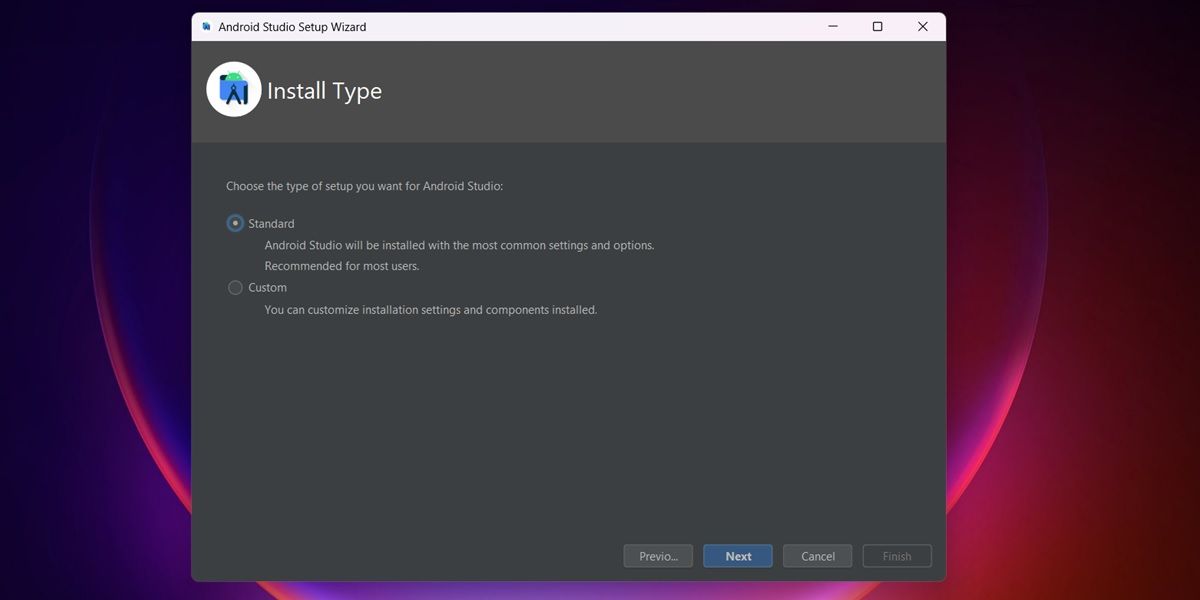
- Open Android Studio on your PC . Skip the windows that will appear when you open it for the first time, which ask you to import a configuration and send data to Google, and choose the standard configuration . Next, accept the license agreement of both SDKs shown in the left panel and click Finish .
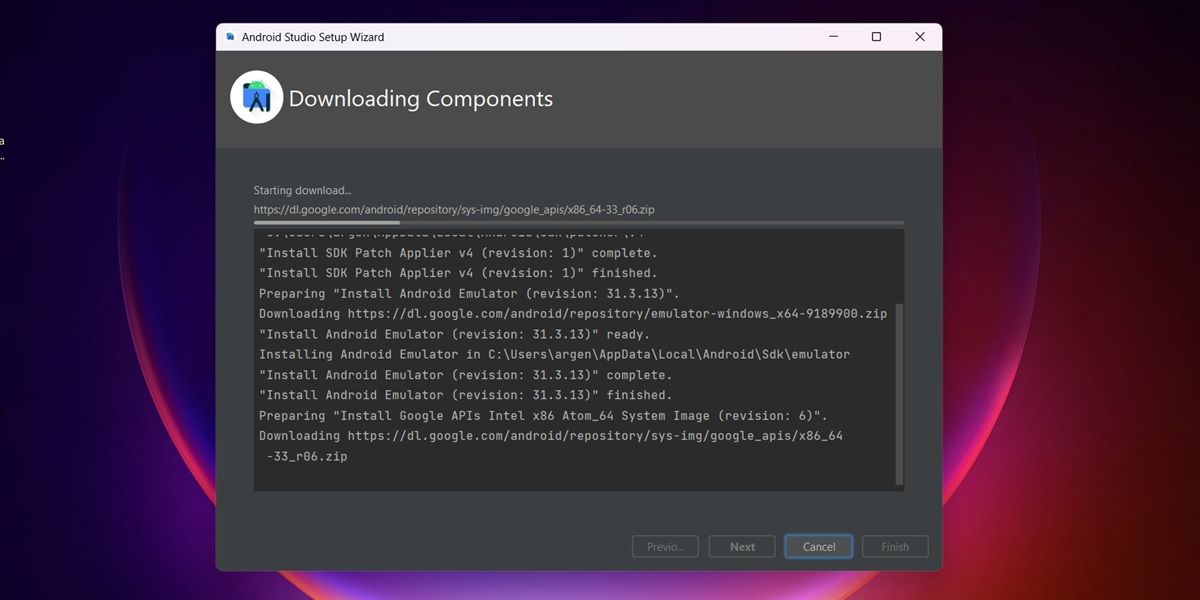
- Wait for Android Studio to finish downloading and installing all the packages needed to emulate Android. Click Finish when finished.
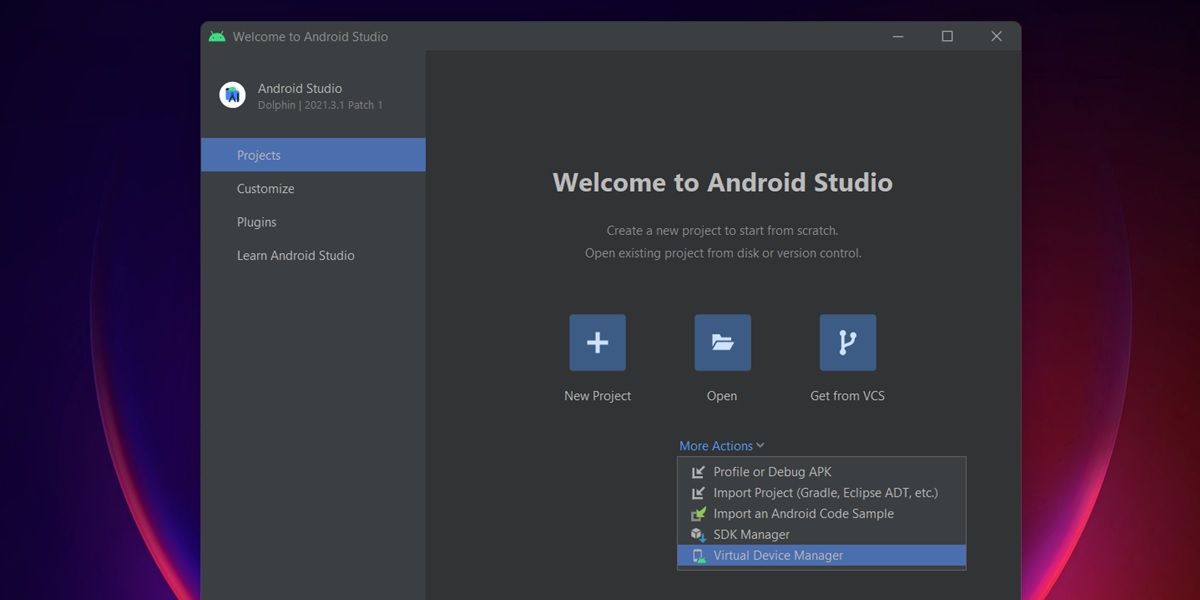
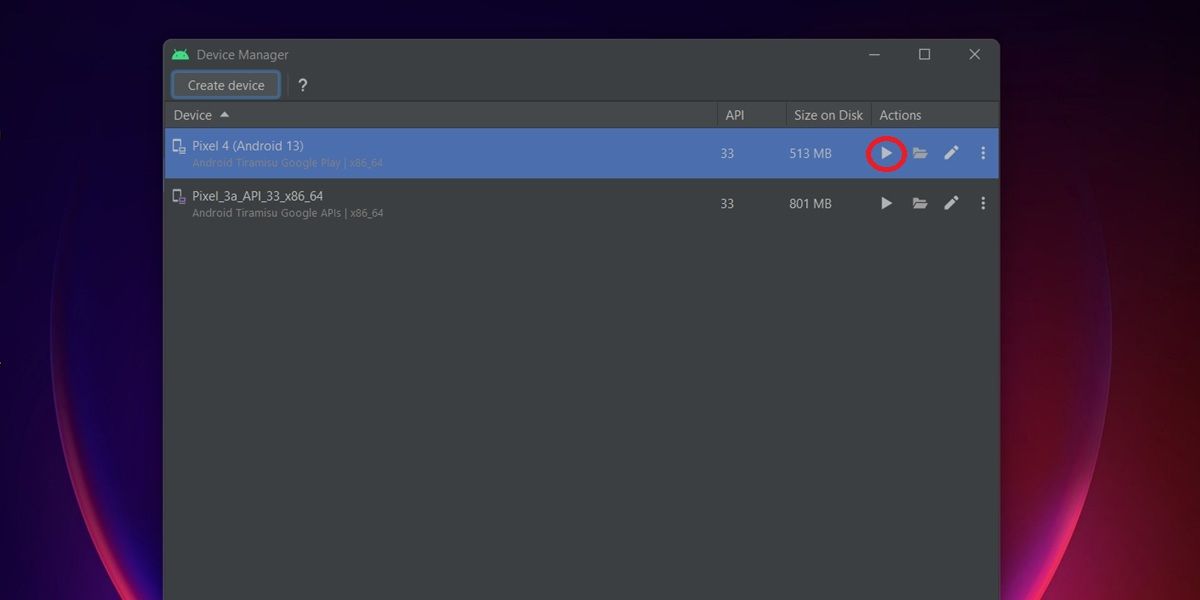
- Now select More Actions > Virtual Device Manager .
- Click on Create device and then choose any device from the list. Preferably, select the most recent mobile that has the Google Play Store icon (this means that you will also install Google services to emulate all the apps you want). In our case, we chose the Pixel 4. Click Next to continue.
- You can also choose a tablet, if you want to use the emulator with a virtual screen similar in aspect ratio to your computer.
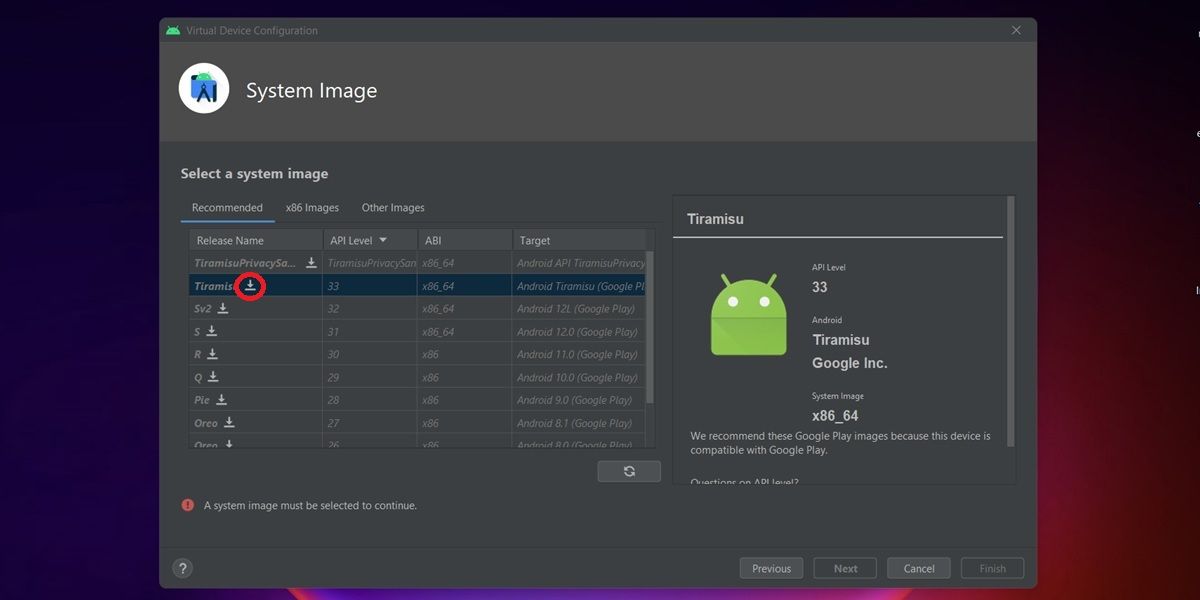
- In the “Select a system image” section, choose Tiramisu . You have to press the download icon that appears next to this option to download it and continue. Currently, this version of Android 13 weighs 1.4 GB , so you will have to wait a while for it to download before you can use it.
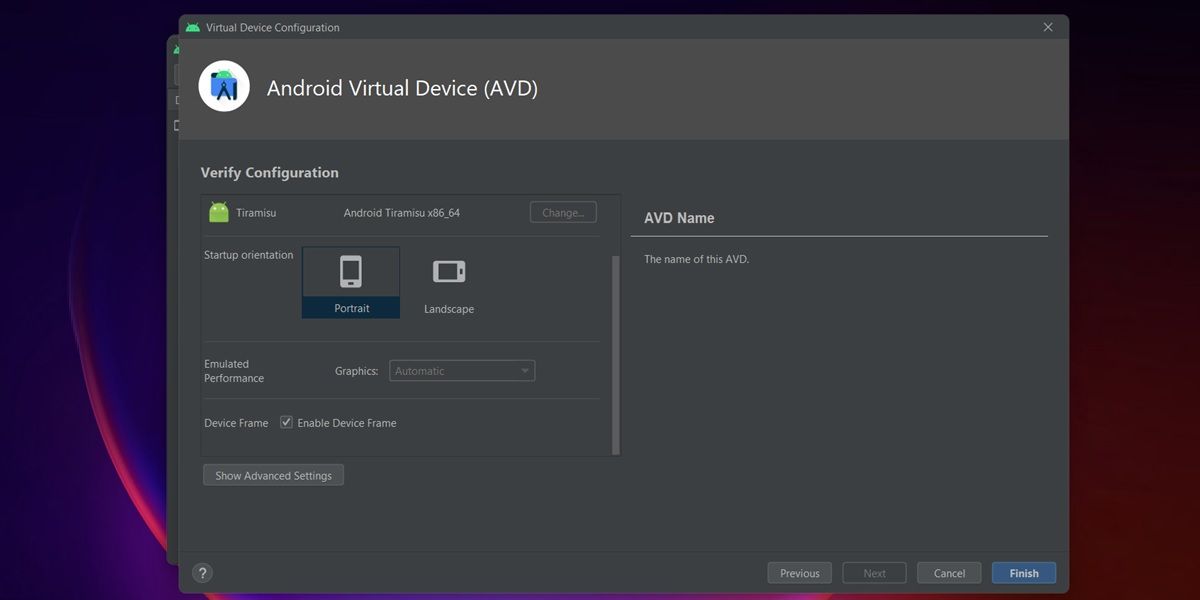
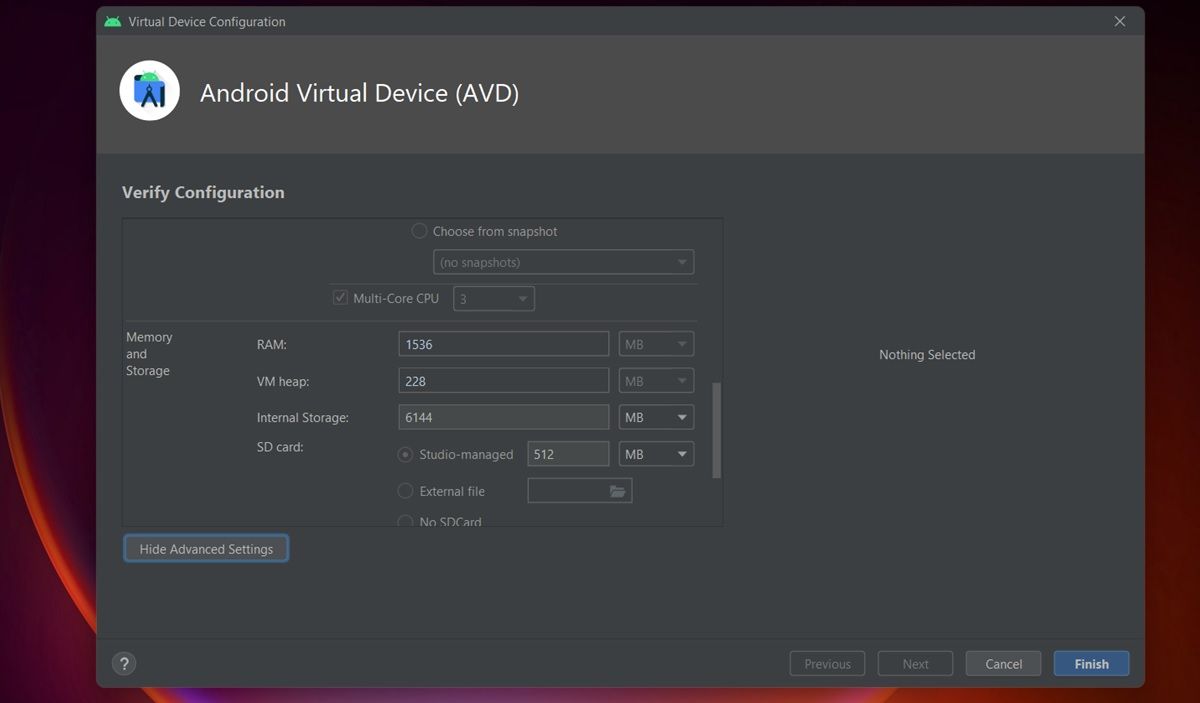
- Next, they will give you several options to configure the virtual device with Android 13 that you are going to emulate. Here you don’t need to touch anything , but you can choose Landscape so that the emulator looks horizontal from the start (during emulation you can change it) and uncheck the Device frame box to remove the mobile frame you chose. When finished, click Finish .
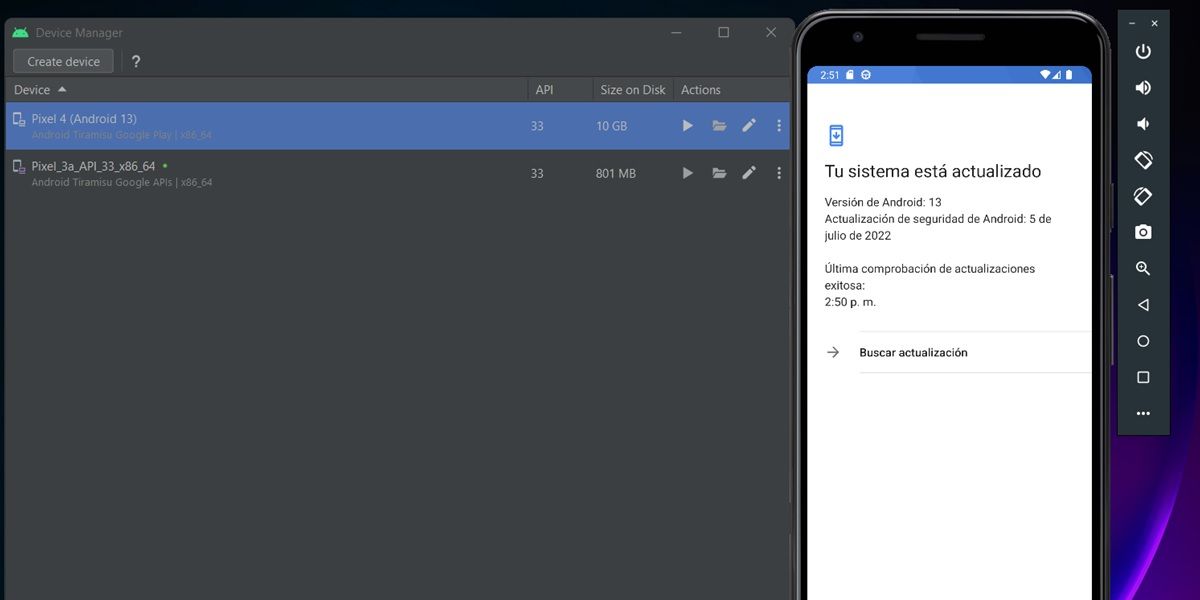
- Finally, in Device manager, press the play button next to the mobile you just selected to boot Android 13.
- The first time you open Android 13 on your PC it will take time to display and it will be slow , so be patient.
Clever! Now you have a virtual mobile with Android 13 on your PC that you can use to do the tests you want.
By the way, if you have the bug with the notification to allow USB debugging (which is not removed no matter how much you accept or reject it), it is most likely due to the ADB drivers that you have installed on your PC. To fix this, tap the three horizontal dots next to the emulated device and select Settings. There, uncheck the Use detected ADB location option and then hit the folder icon to choose the correct ADB location on your PC. That should fix it.
How to improve Android 13 performance on Windows 10 or 11
If Android 13 is not running smoothly on your PC, it could be for many reasons. We recommend you follow all these tips to see if you can improve performance:
- Increase the RAM dedicated to Android 13 : To do this, go to Android Studio > More actions > Virtual Device Manager > Press the pencil icon next to the Android 13 emulated device > Show advanced settings. In the “Memory and Storage” section, go to RAM and increase the amount of RAM you dedicate to the emulation. Also, in “Multi-Core CPU” make sure you are using all possible cores.
- Free up space on your computer – Android 13 emulation may not work entirely well if there is little storage space available on your PC. This is because the emulator saves data to your PC as you use it to optimize its performance. Therefore, if you can’t find space to store more data, you will limit your performance. So empty the Windows Recycle Bin and remove the files you no longer need from your PC to make room for Android 13.
- Deactivate your antivirus : it can also happen that your antivirus limits some functions of the emulator in the background that are necessary for its optimal functioning. Therefore, disable the antivirus for a while and see if the performance of Android 13 improves. In case it improves, you will have to exclude Android Studio and all its processes from the antivirus.
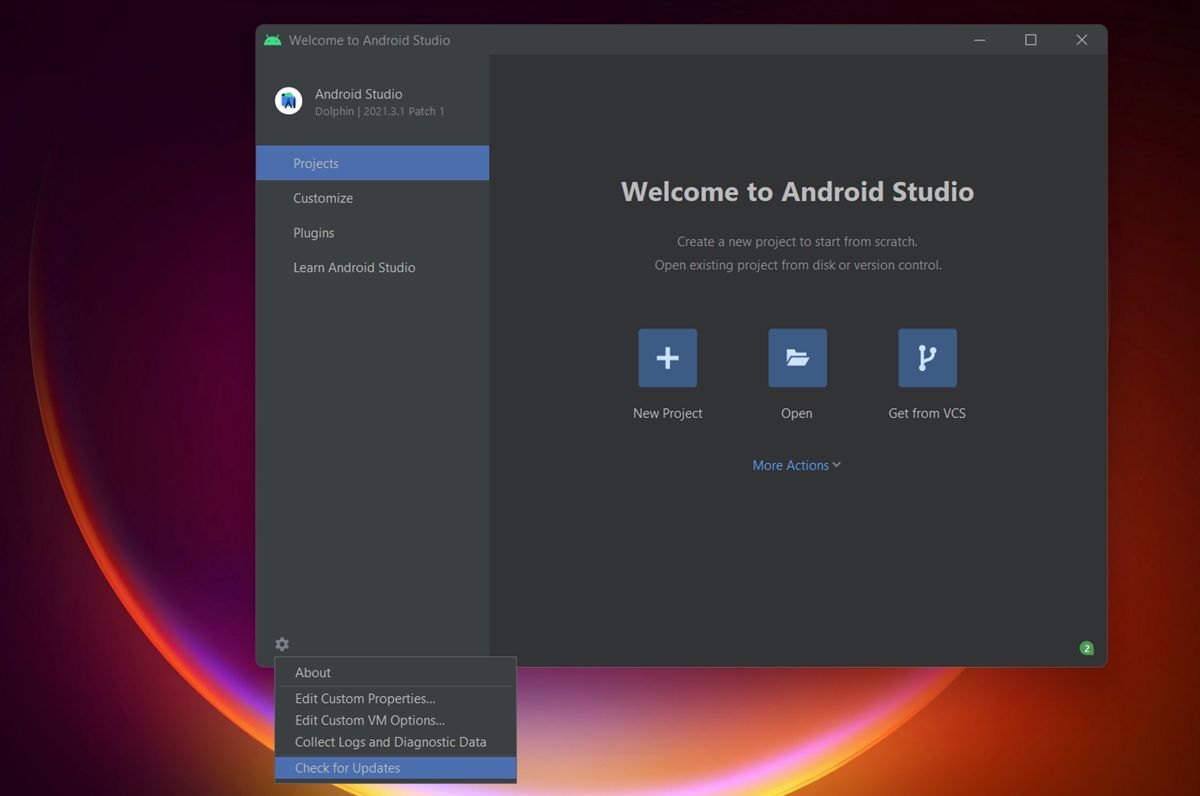
- Update Android Studio – An Android Studio bug or problem can cause Android 13 to malfunction on your Windows 11 or 10 PC. Usually, when this happens, Google immediately releases an update that fixes it. So go to the Android Studio home screen, hit the gear icon in the bottom left corner and choose Check for updates . If nothing appears, it means that it is already updated to the latest version.
- Change the graphics rendering – If your PC or laptop does not have a dedicated graphics card (but an integrated one), it is likely that the emulator is not rendering Android 13 properly. To fix this, go to More actions > Virtual Device Manager > Press the pencil icon next to the Android 13 emulated device > Emulated performance. Choose Software – GLES 2.0 if possible.
Keep in mind that to emulate Android 13 in Windows in conditions you need a relatively powerful PC, preferably at least mid-range. If your PC is low-end or doesn’t have a dedicated graphics card, it may never run Android 13 as you expect . Either way, if you had any particular problems following this tutorial, please leave us a comment to assist you.
