

Many times when we record an audio, we hear all the noises that are around us and if we are looking for a clean sound or audio, this can become a big problem .
But you should not worry, because with this article you will learn how to remove those annoying noises that you have recorded, in a simple way, from your Android devices quickly and easily. You only need a few minutes!
How to remove noise from audio on Android with WavePad
There is an app that you can download from Google Play that will help you in a few simple steps to eliminate noise from your audio.
This app is very intuitive and easy to use , so you won’t have any problems making your edits. You simply have to go to Google Play and download it to start enjoying all its benefits.
Once you have downloaded the WavePad Audio Editor application you have to follow the steps that I am going to teach you later.

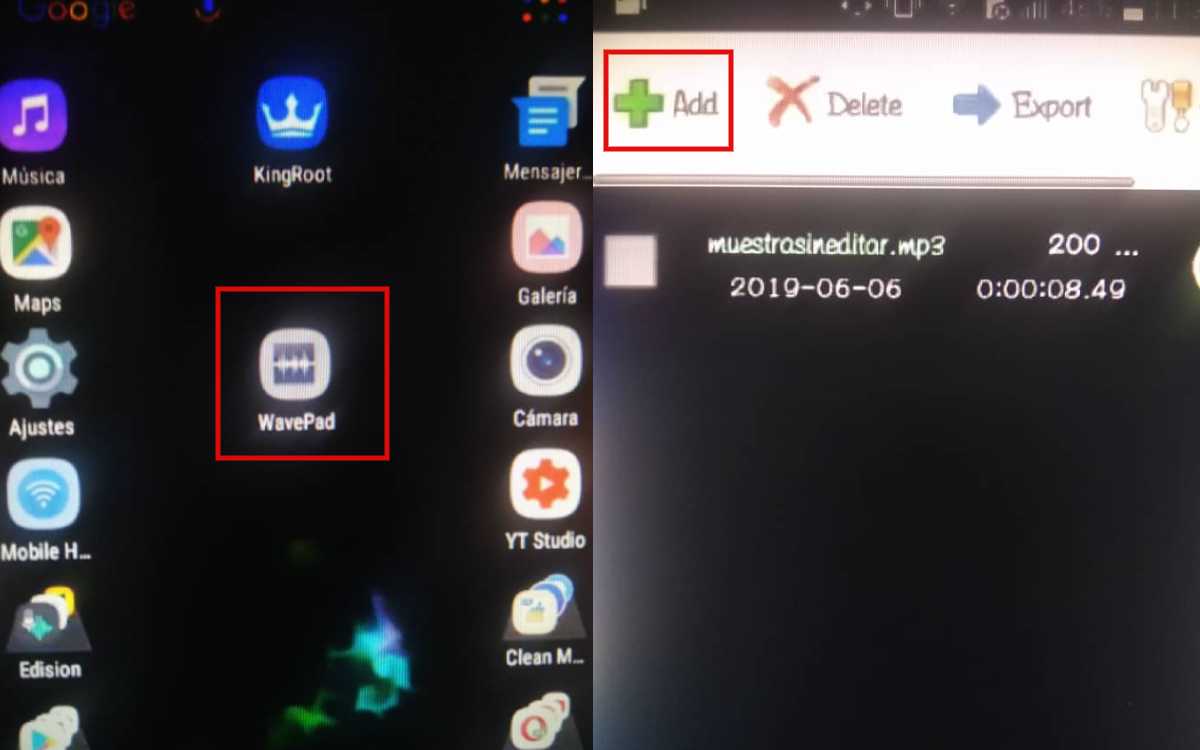
But first, it is important that you know that this app has four basic options , although for now, the one you are going to use is the one with the green cross icon.
Once you have touched this icon, several options will appear so you can choose the one you need.
You will be able to import an audio from your own mobile, import the audio from another application and also record directly from the application. The latter is not something highly recommended because once you pause you will not be able to continue recording the same audio, that is, you will have to continue with a new audio .
The best thing is to record your audios from another application or device and import the file!
Steps to remove noise from your audios on Android
Before starting to give you the steps to use the app, I want to recommend something:
Once you start recording your audio, allow at least 10 seconds to pass before you start speaking. This will allow us to record the noise that exists, which we will need to clean the audio completely.
Now, let’s get started:
- Tap the green cross icon.
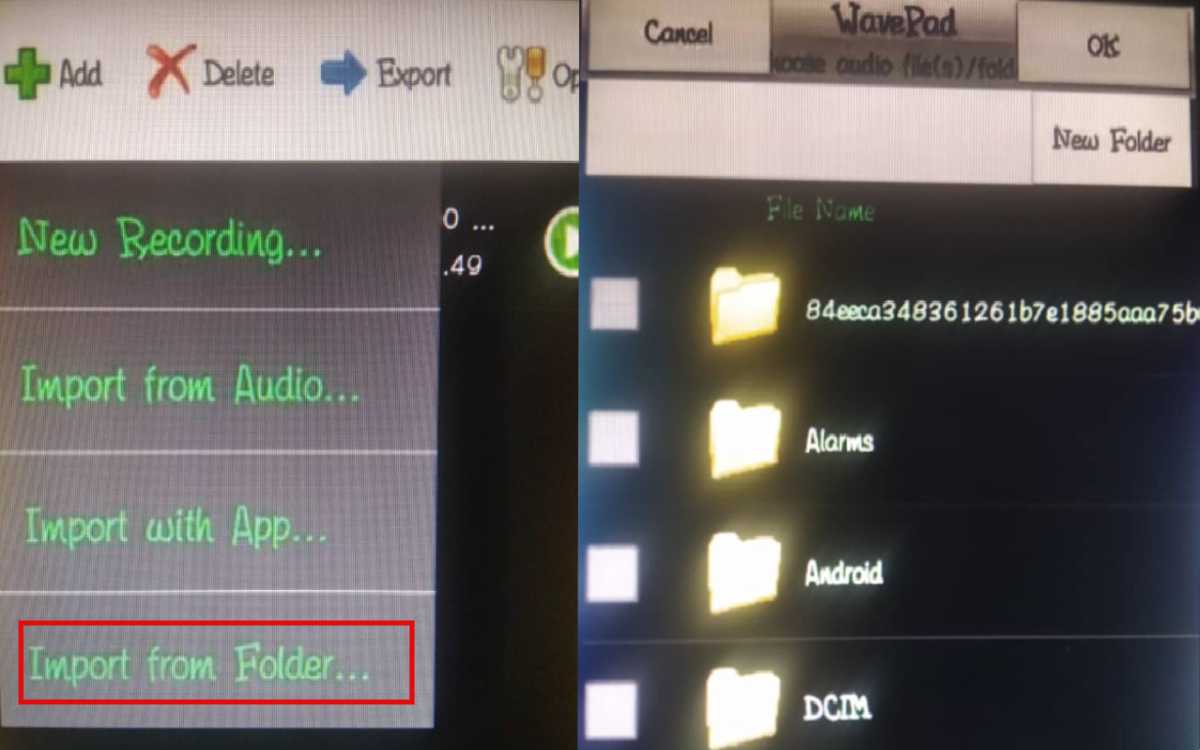
- Then press “ Import from folder ”.
- Find the audio you want to clean.
- Select and press “ OK ”.
- Now, tap on the audio and you will be able to see all the frequencies.
- Scroll down to the “ Effects ” option.
- And in the menu go down until you find the option “ Grab Noise Sample ”. This option takes the 10 seconds that I told you about before as an example to delete them in the audio.
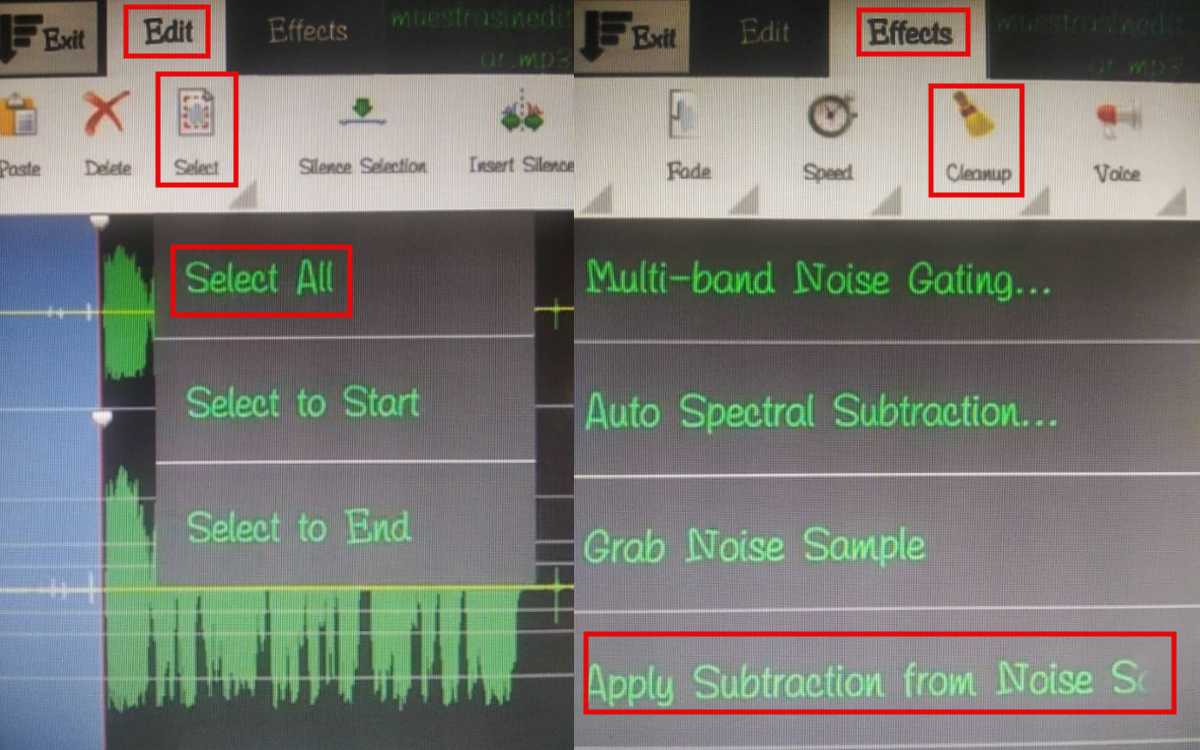
- The next step is to tap on “ Edit ”, then “ Select ” and finally “ Select all ”.
- We go back to “ Effects ” again and tap on “ Cleanup ”.
- We tap on the “ Apply Subtraction from Noise Sample ” menu.
Now you will be able to listen to the audio and if you still consider that it needs to be cleaned a little more, repeat the steps again.
If you are satisfied, you just have to:
- Play on “ Exit ”.
- And finally “ Save changes ”.
It will be saved in the app and to find it easier you can save it in a folder of your choice: click on “ Export ” and “ Export to folder ”, now you only have to choose the folder in which you want to save it and press “ OK ” .
In this step you can change the name and that’s it. Your audio will be ready to be used!
