
Using email can be more difficult than you think. And it is that, even on platforms like Gmail, which have a user-friendly interface , they are not shielded against human error.
A common example of this is sending an email to the wrong contact… has it happened to you? Well, yes to me, and a lot. Therefore, I have prepared a guide with the different ways to cancel and prevent sending an email in Gmail for Android .
How to delete a sent email in Gmail
 Gmail offers a notification button that appears the instant an email is sent, pressing it will cancel the sending . But, this is not the only way to avoid errors when sending an email, here are some configuration tricks that will also help you.
Delete a sent email with the “Cancel” button
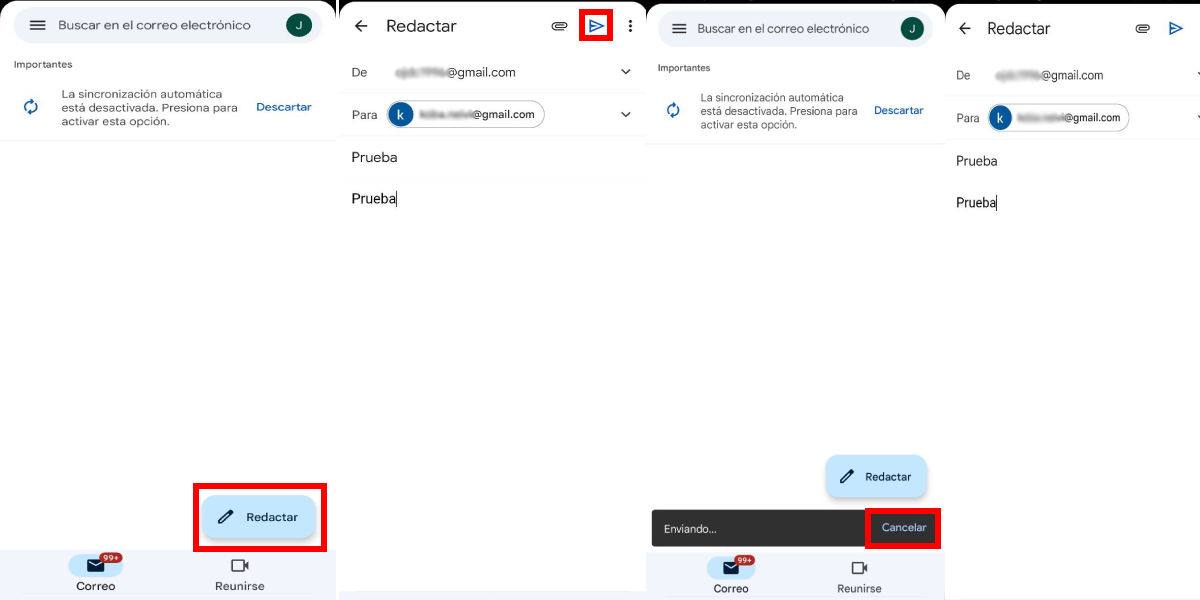 As I mentioned, the best way to eliminate the sending of an email is through the function dedicated to this. Using it is very simple, you just have to follow these steps:
- Open the Gmail app and once you are in the inbox, click on the button in the lower right corner that says ” Compose “.
- Fill in the shipping information as shown in the image above. There I used a secondary email of my own (I recommend that you do the same while you get used to using the undo send function).
- Click on the send mail icon (it has a triangle shape), by doing so you will return to the inbox, there will open a notification box in the lower left corner of the screen that says ” Undo ” or ” Cancel “, click on the.
- After a load of a few seconds, you will return to the compose menu , once there you will be able to adjust the errors that there are in the shipping address or what was failing before sending it definitively.
Activate the option to confirm shipment
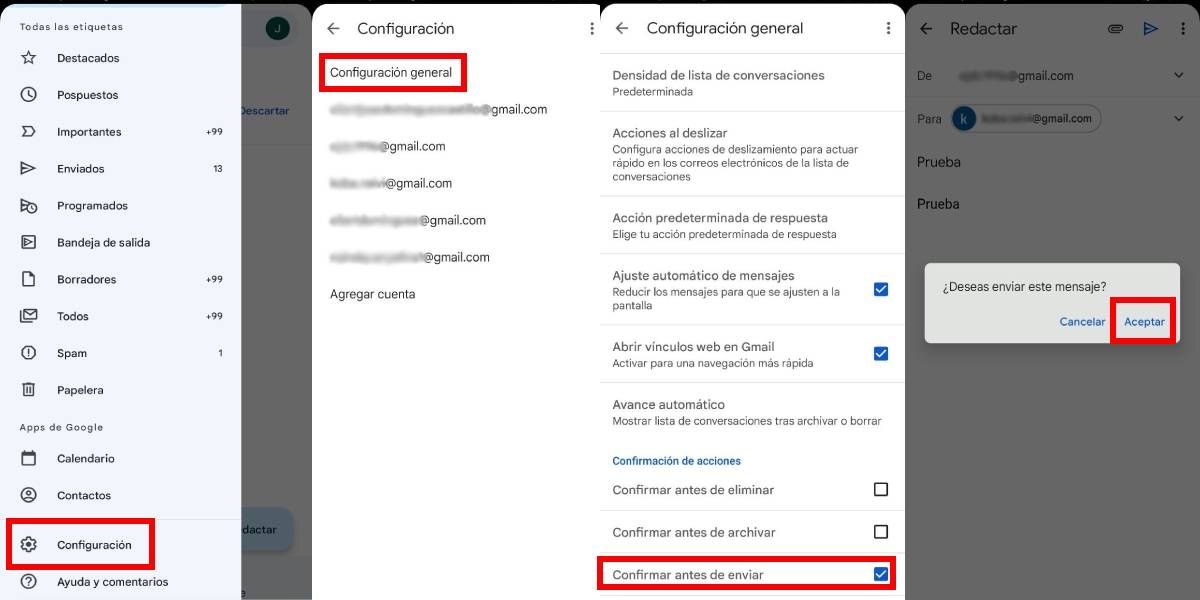
Another way to avoid the erroneous sending of emails is by activating the ” Confirm before sending ” function, since when it is enabled, a box will open that will prevent the immediate sending of the email.
Thus, with this two-step system it will be more difficult to make shipping errors. Here below I leave you the steps to enable this function:
- Once you are in the Gmail inbox, open the side menu (click on the icon with the three horizontal lines).
- Once there, scroll to the bottom of the bar and click on the ” Settings ” button.
- You will change the menu, now click on the ” General Settings ” option at the top of the list.
- Finally, go to the bottom of the bar and click on the ” Confirm before sending ” option to enable the function.
How to set Gmail’s undo send option
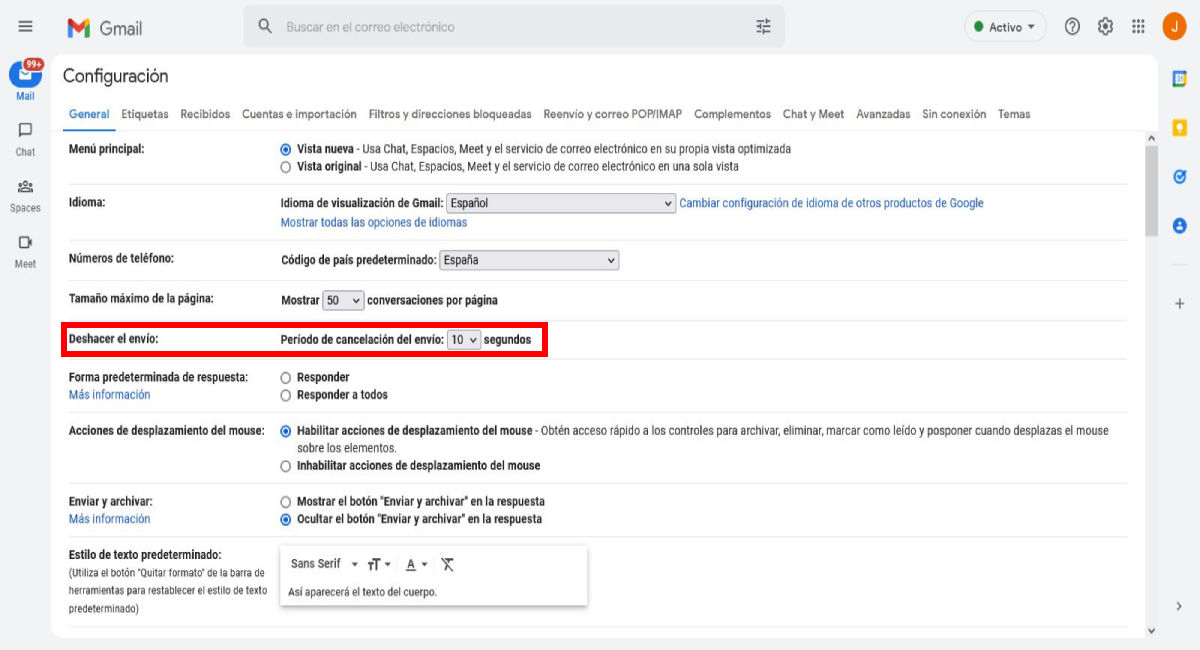 Although the undo or cancel send button is the easiest way to avoid sending a bad email, the duration of the notification is really short , so if you do not press it within 5 seconds after sending, the option will disappear. .
But, you can extend the duration of the box through the Gmail settings menu from a computer, to do so follow these steps:
- From the inbox press the gear icon located in the upper right corner of the screen.
- Doing so will open a sidebar corresponding to the ” Quick Settings ” menu. Hit the first button on the list that says ” View All Settings .”
- After the above, the configuration menu will be loaded. In the “General” tab look for the title ” Undo send: “, there is a list button, open it and select the seconds you want the cancellation period to last (5, 10, 20 or 30 seconds).
- Finally, scroll to the bottom of the menu and click on the ” Save changes ” button to finish with the settings.
Now that you know how to unsend an email , feel free to check out all of our other Gmail guides that we have here at Androidphoria.
