

The Google team is always looking for new ways to improve its platforms and make them more comfortable for its users. Above all, its email service, which is currently the most used in the world .
That’s why we have automatic Gmail filters, a very useful tool to clean your inbox without lifting a finger. We explain how it works step by step!
The two ways to create Gmail filters
First of all, it should be clarified that the function of creating filters in Gmail is only available in the online version , that is, from the computer.
In the Gmail app for Android we have many “advanced” features, such as unsending an email, but you can’t create filters yet . We will have to wait a bit for this new feature to be implemented in Gmail for Android!
Create automatic Gmail filters from your inbox options
This is the fastest and easiest way to create a filter in Gmail, but you’ll need to manually configure the features you want to filter:
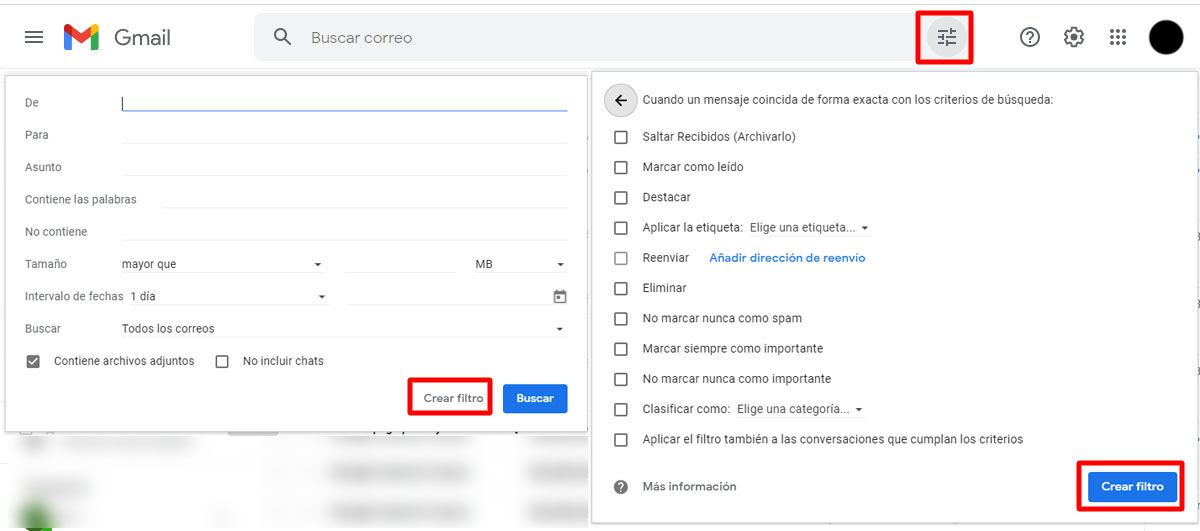
- Click on the advanced search icon that you will see on the left, inside the search bar of your tray.
- Select the features you want to create the filter for .
- Hit “Create filter” .
- Choose what you want the filter to do . That is, what do you want to “happen” to emails that meet the selected criteria.
- Hit “Create filter” again. And now you have it!
Create automatic filters from an existing email or conversation
Another way to create the filters, if you are not sure what parameters to configure, is to use an example email as a guide :
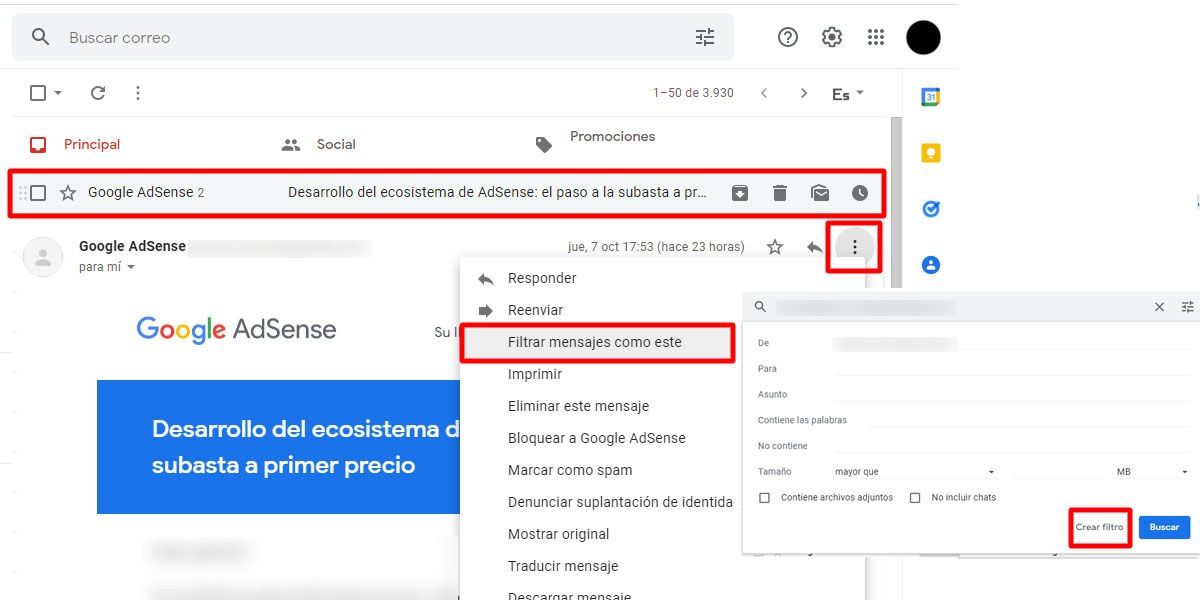
- Open an email like the ones you want to filter (from a specific recipient, with attached files…)
- Click on the “More” option, which has the three dots icon.
- Choose the “Filter messages like this” option.
- The filter panel that we have seen in the first way of creating them will open, this time with the characteristics of this email selected.
- Add more parameters to the filter if you need them and click “Create Filter” .
- Choose the purpose of the filter and finish by clicking “Create filter” again.
How to change your Gmail filters
Don’t worry! The filters you create do not have to stay there forever if at some point they stop being useful to you. Changing the active automatic filters in your Gmail inbox is very simple :
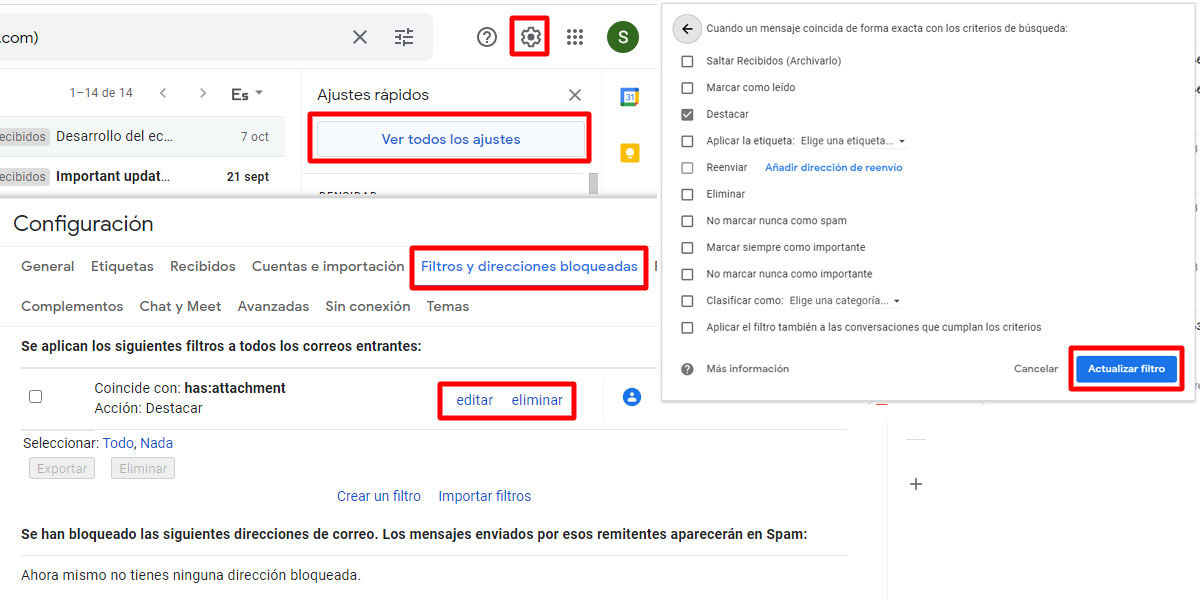
- Click the gear icon at the top of your inbox to open the “Settings” menu .
- Choose the “See all settings” option.
- Go to the “Filters and blocked addresses” tab.
- Go to the filter you want and click “Edit” or “Delete” .
- If you have chosen “Edit” to modify the filter, the filter panel will reopen for you to make any changes you need .
- Finish by clicking “Update Filter” .
How to import and export your Gmail filters
Did you know that you can also share your Gmail mail filters with other users? To start with, you have to export the filters you want, and then export them:
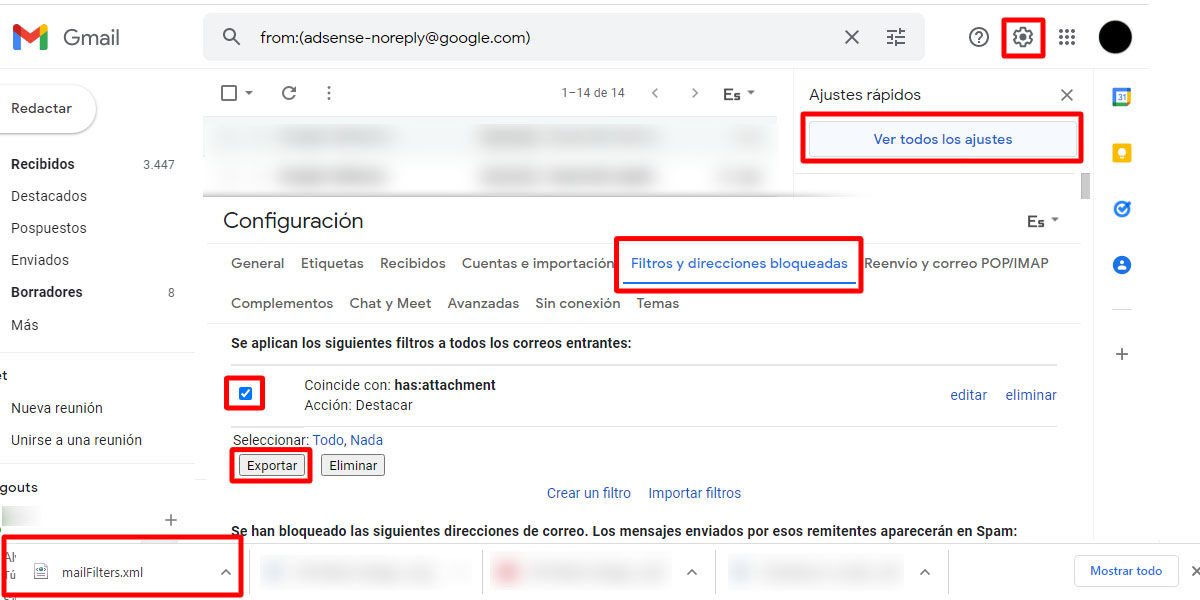
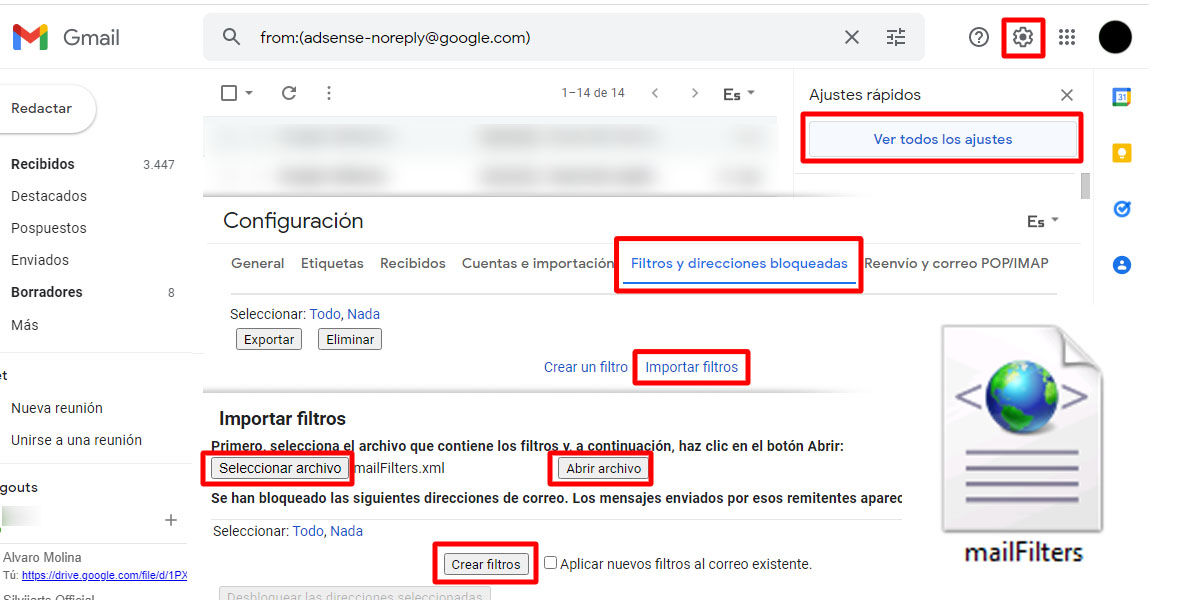
- Go to “Settings” > “See all settings” > “Filters and blocked addresses” .
- Check the empty box that you will see to the left of each filter to select the ones you want to share.
- Click the “Export” button just below the list of filters.
- The filters will be downloaded in “.xml” format , which you can modify as a text file if you want.
- Go back to “Settings” > “See all settings” > “Filters and blocked addresses” on the account you want to apply the filters to.
- Choose the “Import Filters” option.
- Click “Choose File” and choose the “.xml” file you just exported.
- Click on “Open file” .
- When it opens, click “Create Filters” .
Remember that, by default, the filters you create in your Gmail inbox will only affect all the emails in your inbox . Except the Forward filters, which only affect new ones as they arrive!
Advantages of using filters to organize your Gmail inbox
If you receive a large number of emails per day, filters can be very useful to save you the trouble of going through your entire inbox .
For example, you can get rid of messages from a spam sender, highlight those with attachments, automatically forward important emails, ignore mailing lists… There are endless possibilities!
So if you want to mark multiple emails as read in one fell swoop or highlight work emails, Gmail’s automatic filters are your best bet .
And if you see that they are not practical for you, don’t worry! You can always increase the storage of your inbox by a couple of GB so you don’t run out of space and check the emails yourself .
