

Before you regret it, it’s time for you to back up your Home Assistant to the cloud. And, although the backups that you can do manually on the microSD or other local storage are very useful, they have several associated problems. The first is that if the microSD is damaged (something quite feasible), you are left with no point of return . And many times the microSD is damaged without previously giving indications, so it can leave you without the possibility of making the backup on another card and thus lose absolutely everything.
Another problem is that, if for a while you forget to press the button to make the backup on the microSD, it may be that when you need it, you only have a quite outdated version to restore . By making a backup in the cloud, these two problems are solved, since the copy will be stored on external servers that will keep it safe and will be automatically updated to always have a recent version available.
Therefore, here we will explain how to make a Home Assistant backup in Google Drive. This Google cloud storage service gives you 15GB of free space , which is enough to back up Home Assistant. So you won’t have to spend anything to follow this tutorial.
Steps to backup Home Assistant to Google Drive
To create the automatic backup of your Home Assistant you will have to install a very simple extension like this:
- Go to the main interface of your Home Assistant .
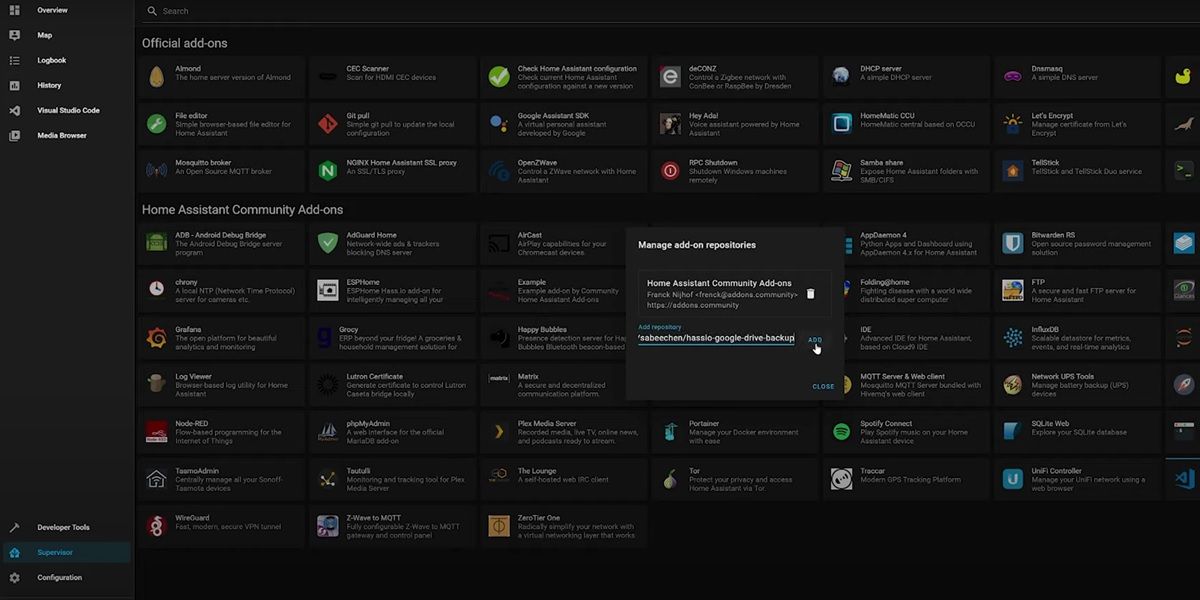
- Go to Supervisor and then select Add-on store .
- Press the three dots in the upper right corner and tap on Repositories .
- In the bar that says ” Add repository ” paste this link: https://github.com/sabeechen/hassio-google-drive-backup
- Click on Add and then a new extension called “Home Assistant Google Drive Backup” will appear.

- Click on that extension and then click Install .
- When the download is done, click Start and then Open Web UI .
- Tap on Authenticate with Drive and enter the credentials of the Google Drive account you are going to use.
- After doing that, you will enter the add-on interface where you can see the status of the backup and configure certain things such as the backup schedule. By the way, the add-on will automatically start to backup Home Assistant to Google Drive every 3 days.
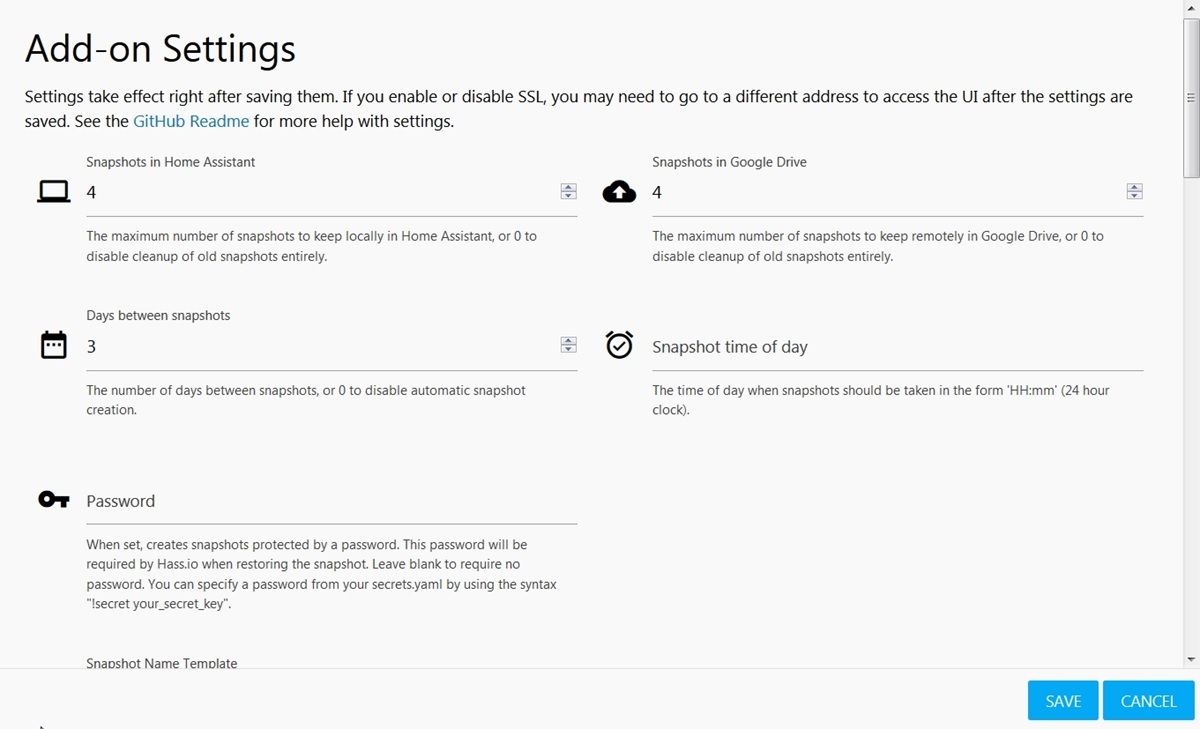
- In Settings , you can choose how many days you want a backup to be made, how many backups you want to be saved locally and in the cloud, the time when the backups are made and even set a password.
Ready! That way, the Home Assistant backups will be saved in the “Home Assistant Snapshots” folder in your Google Drive account.
How to restore a Home Assistant backup?
The backup copies of Home Assistant that are saved in Google Drive with the method that we teach you are exactly the same as those that Home Assistant creates by itself . So the process of restoring a backup is the same as always:
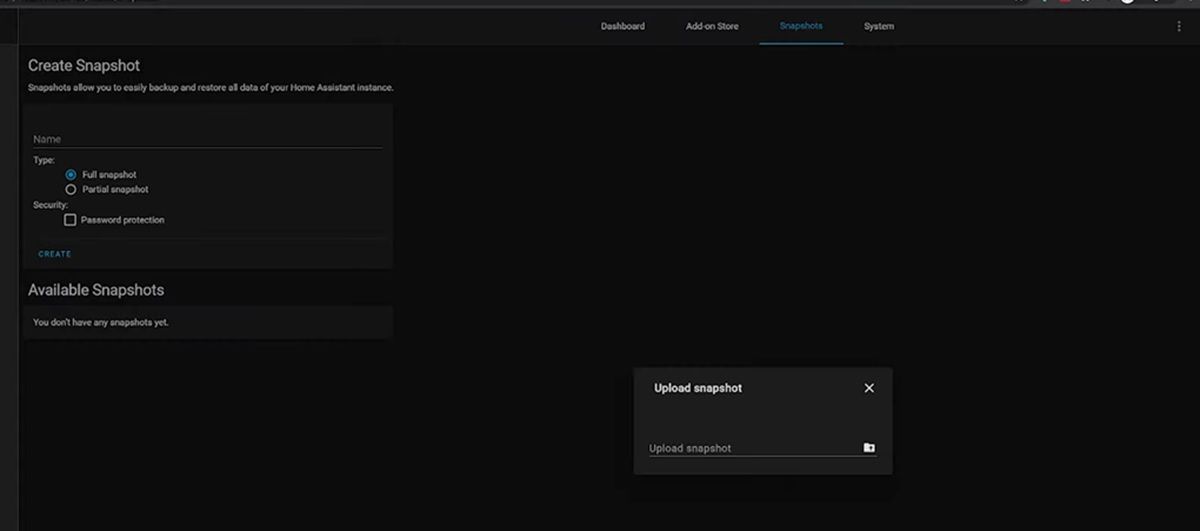
- Go to the Supervisor menu in Home Assistant.
- Select Snapshots (if you already have the add-on installed) and touch the three dots in the upper right corner.
- Finally, click on Upload snapshots and then choose the copy to restore.
- You can also select Actions> Upload on any available backup from the add-on interface to restore it.
- Another way to restore a backup is during the Home Assistant installation process. Once it is installed, before creating the user, press the option Alternatively you can restore from a previous snapshot and upload the backup you want.
Remember that before restoring the backup you must have downloaded it from your Google Drive account. That’s it! We hope this tutorial has been useful to you and you are no longer afraid of losing all of your Home Assistant.
