
Clubhouse, the live audio chat application, has become very popular for allowing its users to listen to or participate in very interesting live discussions. Unfortunately, what is said in the Clubhouse stays in the Clubhouse , since the app does not allow you to record the talks. Once a Clubhouse room is closed, the conversion that was in it is gone forever.
And it is a pity, because in certain Clubhouse talks there is information or data that is worth recovering. Some conversations can even serve as a source of inspiration and be useful later in life . But don’t worry, because here we have found a way around this Clubhouse restriction. So, if you are interested in recording the talks of the app, join us to discover how it is done.
So you can record your conversations in Clubhouse
First of all, it is necessary to warn you that recording a person’s talk without their consent is a crime and, depending on where you live, you could be sued for it. So always let the speakers know that you are going to record before doing so to avoid inconvenience.
Having clarified that point, let’s see what you can do to record conversations in the Clubhouse. Specifically, you have two options: use the native iOS screen recorder or use the Voice Notes app . Each of these methods has its advantages and disadvantages, so we are going to explain both of them so that you can choose the one that suits you best.
How to record clubhouse talks with the Voice Notes app
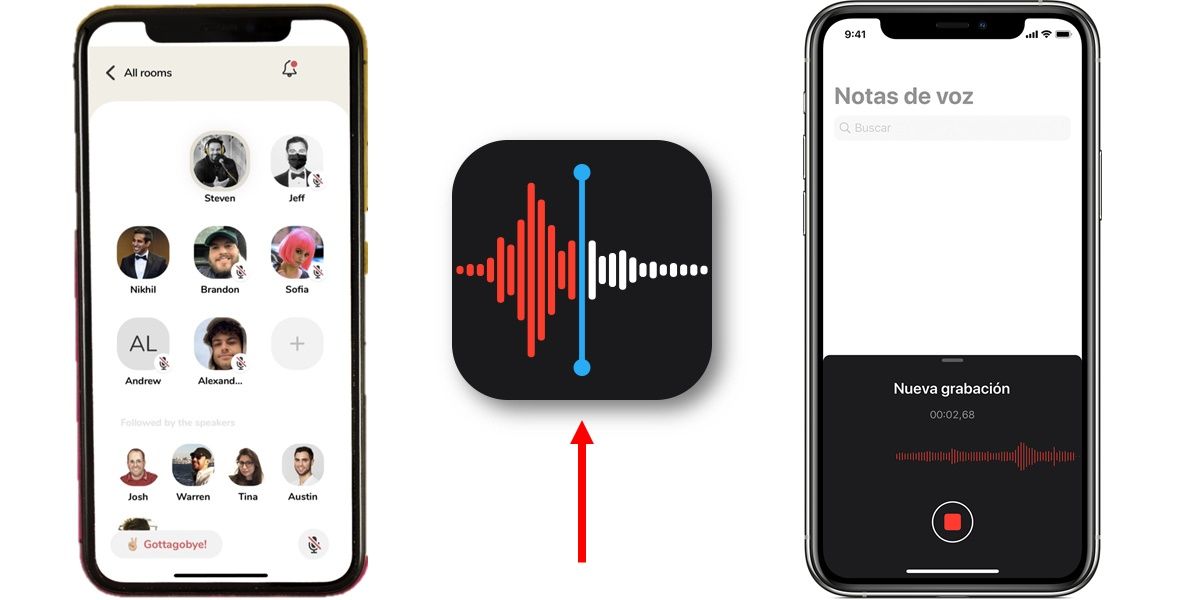
Voice Notes is the name of the native iOS application for making audio recordings. This app can be used to record conversations in Clubhouse, but the audio quality will not be ideal . And it is that with this app the audio will be recorded from the microphone, so you may receive interference from the environment. Anyway, here are the steps to follow to use it:
- Go to a calm and quiet place.
- Open the Clubhouse app and join the room where you want to record the talk.
- Turn up the volume on your phone (you shouldn’t be wearing headphones) until the chat is clearly heard.
- Now tap on the home button of your iPhone to find and open the Voice Notes app .
- Touch the red button that you will see at the bottom to start recording.
- Thus, the conversation will already be recording. When it’s done, press the red button in the Voice Memos app again to stop recording.
Ready! The recording will be saved on your mobile and you can listen to it again from the Voice Notes app . There, you can also share it with other people and even send it by email.
How to record clubhouse talks with the screen recording function
You can also use the iOS screen recording feature to record your Clubhouse talks. As you can guess, the problem with this method is that the recording will weigh more, since you will not only record audio , but also the screen. The good thing is that later you can convert the video to audio and the result of the recording will be of very good quality. Are you interested? Follow the steps below to use this method:
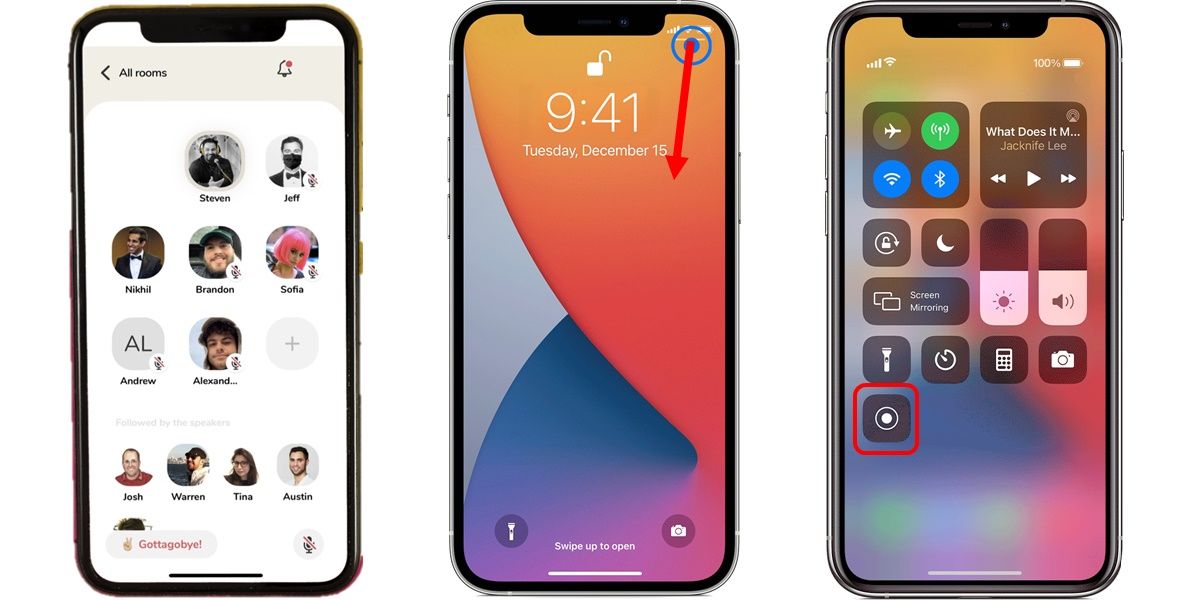
- Open the Clubhouse app and join the room where you want to record the talk.
- Swipe your finger on the screen from the bottom up to open the Control Center . If you have an iPhone X or later, you need to swipe down from the upper right corner.
- Press the screen record icon (the one with the circle with a dot in the middle).
- That way, all the talk in the Clubhouse room will begin to record. If you want to stop the recording, press the red bar at the top and confirm the action by pressing Stop.
And that’s it. The recording will now be available on your iPhone in the gallery application. If you do not see the screen record icon in Control Center , go to your iPhone settings, enter the Control Center option and touch the “+” button that is right next to the Record screen option. And so the icon should already appear as a shortcut in the Control Center.
Anyway, we hope that this tutorial has been useful to you and if you have any questions, tell us from the comments to help you.