If you are bored with your Android font, you are in the right place. Next we will show you two options that will allow you to customize your phone with new font styles and the best part is that you do not need root. Choose the option that best suits what you are looking for.
zFont, an app that will allow you to change the font of your Android
zFont in an application that you can find in the Play Store and is installed and launched like any other application. Using it can become somewhat annoying due to the number of ads it has. The application has a paid version with a cost of €4.88 to remove the ads.
When you open zFont you will see that not only does it have the option to install different font styles, but it also has emojis and fonts that not only change their style, but also change their color. The truth is that it is a very useful application when it comes to customizing Android.
But first, you need to check something very important

First of all, check that your phone has the option to change the font natively . In case your phone does not have this option, you run the risk of not being able to return to your factory source.
- Go to Settings
- In the search box type Sources . If you get the option to change the font style, you can follow the other steps below.
In case you don’t have this feature built into your phone and you don’t want to risk permanently losing your native font, don’t worry , we also have a solution for you, just go to the other option below. below.
Steps to install new fonts with zFont
- Launch the app.
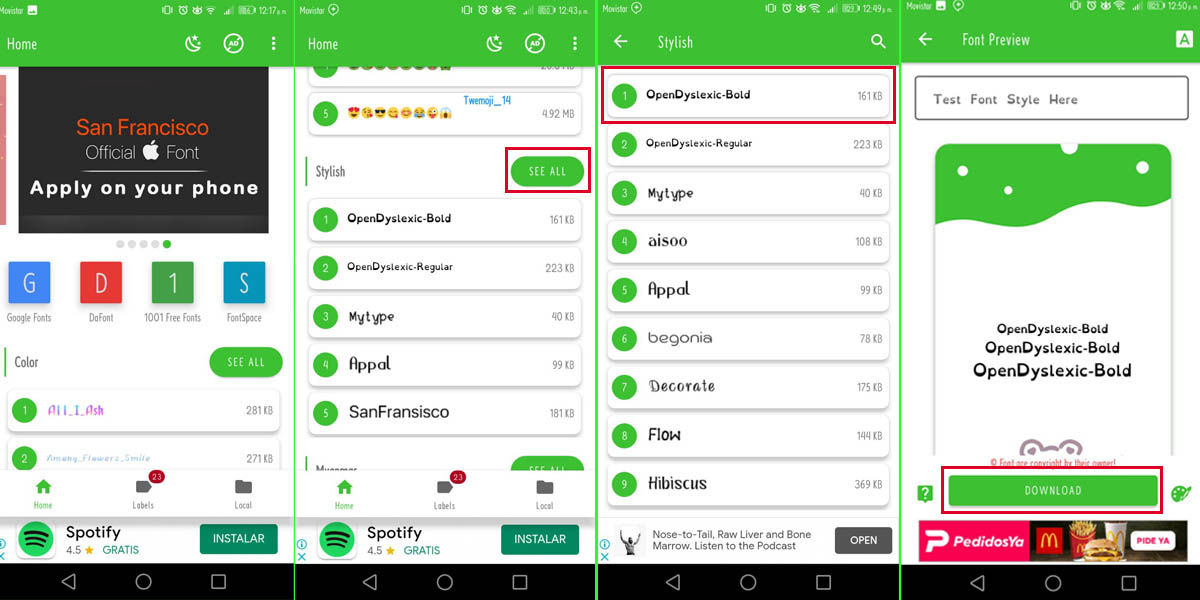
- On the main zFont screen, scroll down the options until you find the Stylish option and press See all . Another way to search for fonts is that when you start the application, a navigation bar will appear with the options Google Fonts, Dafont, 1001 Free Fonts , among others, all these options offer different types of fonts. Choose the one you like.
- After selecting a font type, the Download option will appear at the bottom, select it to download.
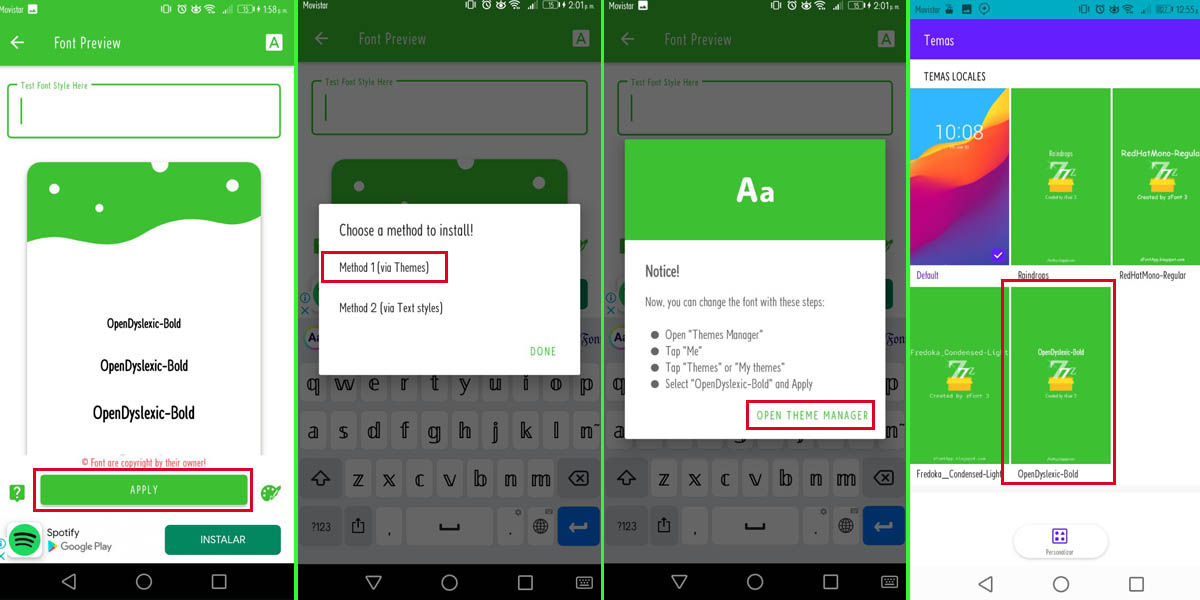
- Once the font is downloaded, again at the bottom press the Apply button.
- A window will open with different options, depending on the phone you have, these may vary. Choose the first method (Method 1).
- Now select the Open theme manager option. And voila, this theme will have been added to the library.
- Now all you have to do is select it and press Apply . This last step will also depend on your phone, but it turns out to be quite intuitive.

Something you should know is that there are divided opinions regarding zFont, some love it, others hate it, because many users have reported bugs due to the change of font. It is very difficult to find an app that does this without bugging your Android phone. Some report that their phones become slower, the wallpaper image changes automatically and in the worst case, the device restarts. It is important that you take this into account if you choose to use zFont.
On the other hand, some users are fascinated by the application, which ultimately fulfills the objective of allowing you to customize an Android phone with a wide variety of options. You decide whether to give it a try or not.
But if you don’t want to risk the functionality of your phone for aesthetics, then the next option might be better for you.
Font keyboards: change the font of your Android without risk
This is the installation of a simple keyboard. While not just any keyboard , these keyboards are specially designed to change the font of letters as you type, and they work in a much less aggressive way than zFont, since you’re not changing your Android’s system font.
Steps to install new fonts with Font Keyboards
Basically, the steps are always the same , since all you have to do is set the keyboard as default. The applications ensure that they respect the privacy of their users and do not store their data.
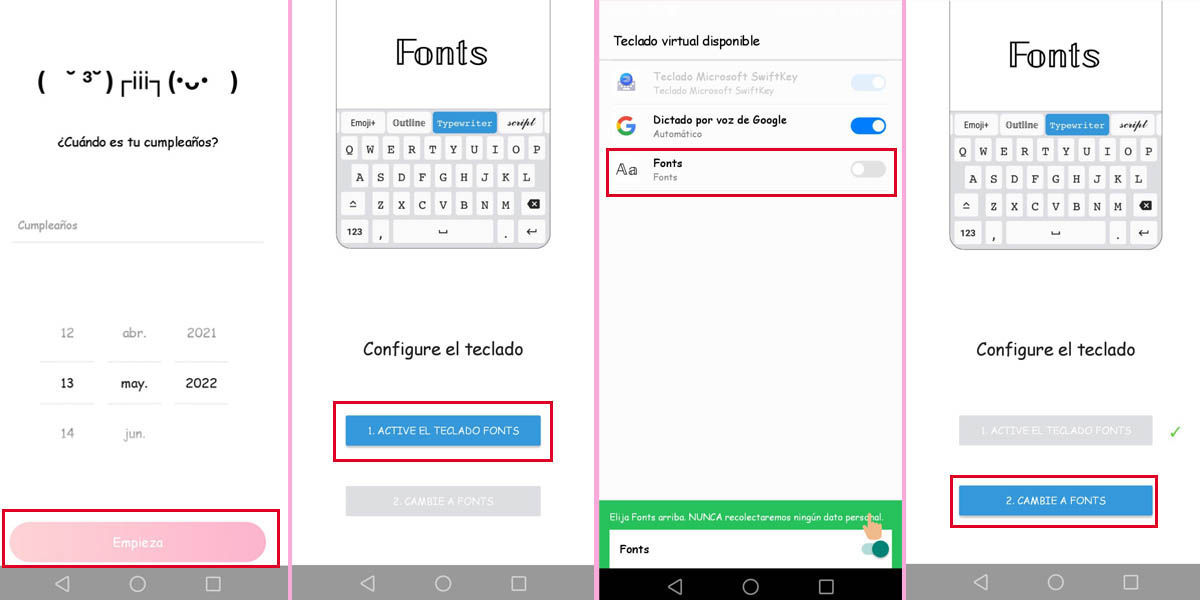
- In this particular case, ( Fonts – Letters Keyboard ) when you start the application you are prompted to enter your date of birth, place it and press Start.
- Then press Turn on keyboard fonts.
- Check the Fonts box. By doing this, several Android system prompts will appear, just press OK.
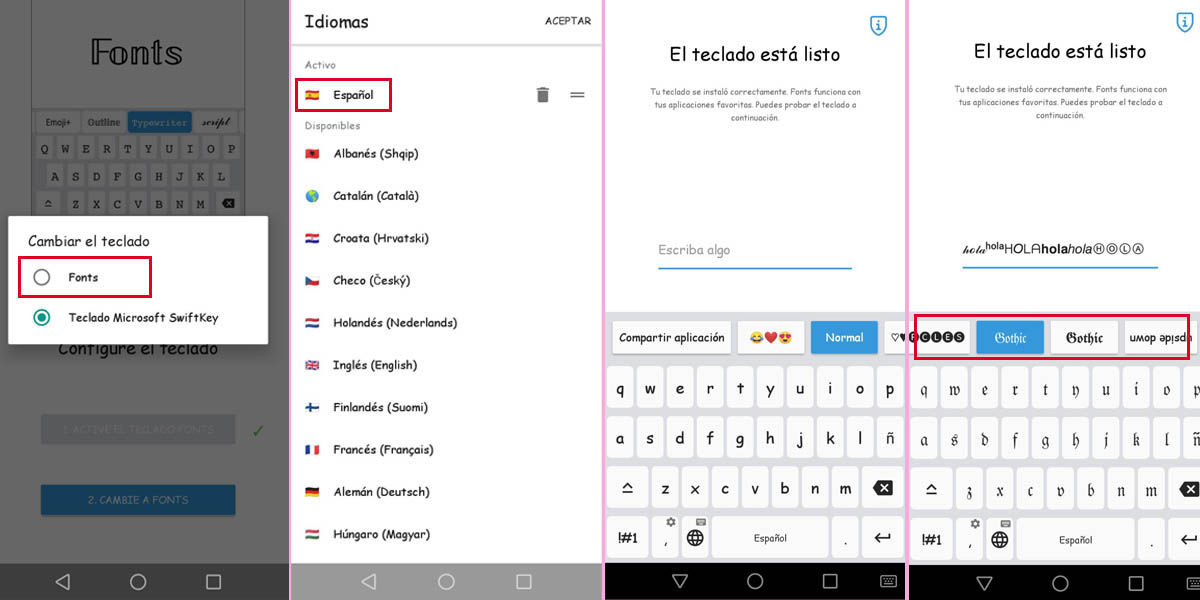
- Select the Change to Fonts option.
- Then press Fonts.
- And finally, select the language.
As you can see in the photos it is quite simple. You only have to follow the steps indicated by the application itself . Once the keyboard is installed, the available fonts will appear at the top of it.
In the Play Store you will find many options, but here we leave you two of the best known for you to try: