
A restore point can be created in Windows 11 in a few steps, a highly recommended procedure that can save you on more than one occasion from possible errors in the operating system and recover a previous moment when the PC was working correctly.
This procedure creates a backup of the entire system that can later be restored when Windows 11 goes wrong due to a virus, the installation of an incompatible driver or for other reasons, so it is important to create it when the computer is working well.
That is, you would have to create it when your Windows 11 computer is running fine , so that when it crashes one day, you can go back and go back to that day where everything was working fine. All this can be done in a simple and quite fast way.
Now that you know what this option is for, the steps to create those restore points in Windows 11 are as follows:
- Press the Windows + Q key combination, type “restore computer” and click on the “create restore point” option . You can also access this utility by clicking on the magnifying glass icon on the taskbar if you didn’t want to hide the search button in Windows 11.
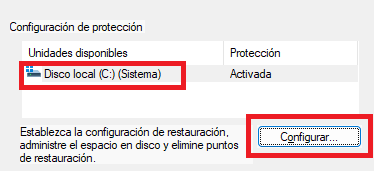
- Without moving from the “system protection” tab , select the corresponding drive (in our case the C: drive) and click on “configure”.
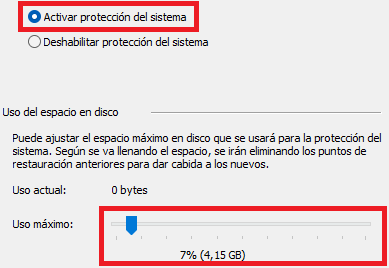
- Now select the option “activate system protection” and move the bar to your liking to set the size that the restore point will occupy. When you have it, click on “accept”.
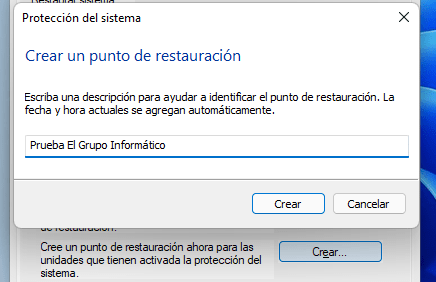
- Then click on the “create” button that is now enabled.
- Next, set a name for the restore point, you can give it whatever you want and accept the changes, it will start creating as soon as you close the window, the time it takes will depend on many factors, but it should not take too long.
System Restore in Windows 11
To use the restore point and restore Windows 11 you must have previously created one with the steps indicated above, otherwise the wizard will give you an error. To use it you must follow these steps:
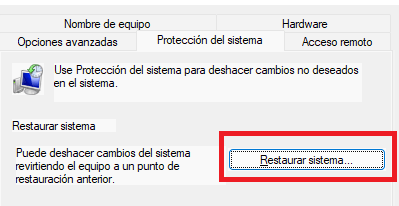
- Without moving from the “system protection” window, click on “system restore” .
- The next step is to choose the restore point to which you are going to restore the PC, you can choose one of them if you have several.
It only remains to follow all the steps of the wizard and transport your Windows 11 computer to that day and time when everything was going well, keep in mind that applications and some settings can be deleted, so you must take this fact into account.
As you may have seen, it is recommended to have system restore enabled in Windows 11 to create a restore point in case you need to recover the normal functioning of your computer that it had at a specific time.