
Ever since Google Photos stopped offering free and unlimited storage , here at Androidphoria we haven’t stopped presenting you with alternatives to continue having unlimited space for your photos. However, even with these alternatives, you are going to have to pay one way or another to save your photos in the cloud. Therefore, this time we want to propose something different…
If we tell you that you can set up your own storage in the cloud , you will surely think that it is something complicated and that only someone with programming knowledge can do it, but it is not like that. With the Synology Photos app, it is very easy to create a home Google Photos. Don’t you believe us? We’ll show you right away…
What do you need to create your homemade Google Photos with Synology?
Synology Photos is an official app from Synology, the maker of famous home NAS servers. Using this app is totally free, but it requires you to have a Synology NAS server . If you don’t have one, the most recommended and sold on Amazon is the Synology DS220+ which is worth around €350.
These servers often come without any storage at all, so you’ll want a hard drive like the $117 Seagate IronWolf 4TB for NAS. Although there are also 6 TB ones for €180, but that is your decision depending on how many things you plan to store.
Once you have the NAS server and hard drive, you will need to download DiskStation Manager version 7.0 Beta (Sinology’s web operating system), as right now it is the only version that has compatibility with the Synology Photos application that we will use in this tutorial to create the storage space for photos in the cloud.


Steps to create your own homemade Google Photos
Do you already have everything you need? Now follow these steps to set up your own homemade Google Photos:
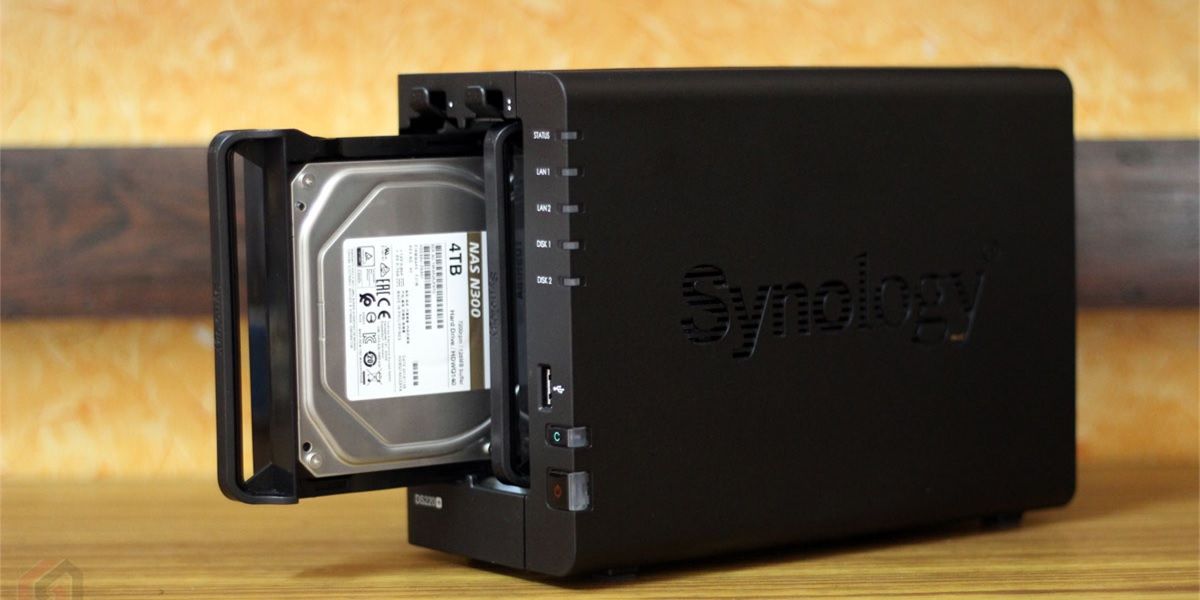
- Plug the NAS server into power and insert the hard drive through its slot.
- Connect the server to your home router via Ethernet, and then turn it on.
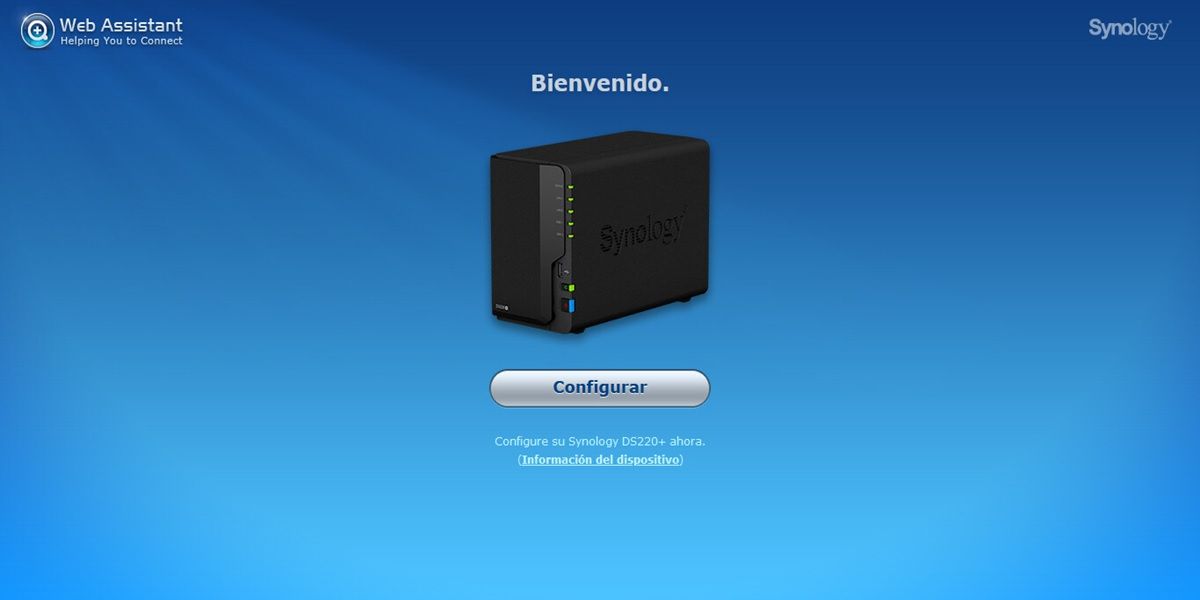
- From a PC (which must be in the same network as the router where you connected the NAS), open the browser and go to this address : http://synologynas:5000
- You will see a welcome screen and a Configure button. Press it to install the operating system on the hard drive.
- Next, put name and password to the server and configure your user.
- Optionally, set up QuickConnect , which is a feature where you get a web address to easily access your NAS storage when you’re away from home.

- After doing this, you will arrive at the start of DiskStation Manager. There, go to Control Panel > Update and restore and choose the manual update option to select the version 7.0 update file that you should already have on your PC.
- DiskStation Manager beta is downloaded from Synology Download Center by choosing your NAS model and selecting OS Version as version 7.0 or later.
- Now, if you want to bring your photos from Google Drive or Dropbox to your NAS server, do it with the Cloud Sync package that you can download from the same download center that we mentioned before. Photos from Google Photos must be exported with Takeout.
- Next is to install the Photo Station app from the Package Center in DiskStation Manager.
- We also recommend installing the Video Station package to be able to save and access your videos in the cloud.
- Lastly, copy all your photos to the Photos folder in DiskStation Manager’s home directory.

Ready! Now you can access all your photos saved on the NAS from a PC or Synology Photos app for Android or iPhone mobiles. In fact, with the Synology Photos app, you can enable automatic backup so that the photos you take with your mobile are automatically uploaded to the NAS server.
This cloud storage can be shared with all the members of your family , maintaining the privacy of each one. You only have to create an account in DiskStation Manager for each person, which will be protected with a username and password.
And that would be all. Actually doing all this is less complicated than it seems , so go ahead and create your own homemade Google Photos without fear.