
Since many VPN services (mainly free ones) are as dangerous as surfing without a VPN, we have decided to prepare a basic guide on how to create your own VPN. For what ? Well, to bypass the censorship or geographical restrictions of some websites and navigate safely when using public WiFi networks.
Of course, the method that we are going to teach you to create your own VPN, which consists of configuring an OpenVPN server on a VPS, will not make your Internet connection 100% anonymous . In addition, your bandwidth will be limited and you will have to pay monthly for the VPS, although it is cheaper than hiring a third-party VPN service.
Exposed the main pros and cons, if you still like this idea, join us to see how to create your own VPN service. We’ve made the guide as simple as possible so you don’t get overwhelmed , as setup requires a bit of work and being familiar with concepts that the average user may not understand.
The first thing you have to do is create a VPS (Virtual Private Server), which is the Linux virtual machine that your VPN server will run on . There are many VPS providers, but we particularly recommend Linode as it is not a very complicated option. Here are the steps to create your VPS in Linode:
- Go to the Linode website and create an account.
- Once you have an account, click here to start creating the server.
- In the Distributions section, select the newest version of Ubuntu LTS . Below this option, choose the server region (you can change it later by contacting Linode support).
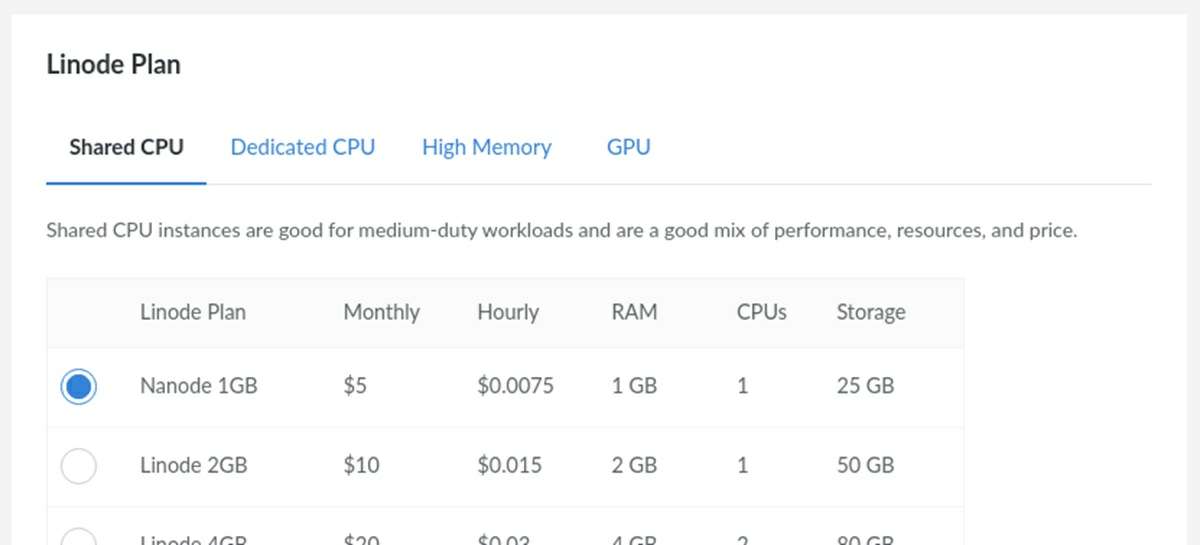
- In the part where they make you choose a plan, hit the Nanode 1 GB option for Shared CPU. Remember that VPNs don’t require a lot of processing power, so that plan will suffice.
- Finally, enter a password in the Root password box. Then, press the Create button to finish creating the VPS.
Ready! You already have a server that you can run a VPN on. To do this, you must configure the VPS in this way:
- Open your VPS tab in Linode and tap on Launch console (this option is at the top).

- Thus, a Terminal will open where you will be asked to log in . In “localhost loging” enter root and hit the Enter key. In “Password” put the password that you had created previously and press Enter.
- You will see a welcome message with all the server data. After that, enter this command: wget https://git.io/vpn -O openvpn-install.sh && bash openvpn-install.sh
- Now, they will ask you for your IP address, what protocol to use and other information. Hit Enter when asked for the protocol and DNS server, but when it asks for the port, enter 443 .
- After doing this, the software necessary to run a VPN will be installed. At the end of the installation, an .ovpn file will be created in the “root” folder of the server that contains the connection and login information of your VPN, so you must extract it. To do this, create a web server by entering the following command: python3 -m http.server 80
- Next, copy the IP address of your VPS (it appears in its file in Linode).
- Paste the server’s IP address into your PC’s browser (without any https or http) and hit Enter to access. Press the file ending in .ovpn to download it.
The OVPN file allows anyone to connect to your VPN, so keep it safe . If you think someone is accessing your VPN without your permission, run the VPN setup command again (the one that ends in “openvpn-install.sh”) to revoke the existing file and generate a new one.
How to secure your VPN server

You have already successfully created your own VPN, but don’t think you are done. There are still a few things you should do to reduce potential VPS server security vulnerabilities . The first thing we recommend you do is activate automatic server updates in this way:
- Enter the following command to install any available updates: apt update && apt upgrade -y
- Now, run this command to enable automatic updates: apt install -y unattended-upgrades
Ready! The next thing you should do is disable SSH access so that no one (including you) can access the server, except from the Linode Terminal . This will prevent strangers from trying to access your server by force. How do you disable SSH access? Thus:
- Run this command so that the SSH service does not start when the server starts: systemctl disable ssh.service
- Then stop the currently running SSH service with this command: systemctl stop ssh.service
With this you have made your server only accessible from the Linode console. If you want to reverse this later, just run these commands: systemctl enable ssh.service
and systemctl start ssh.service .
The last recommendation we can give you is to enable two-step authentication for your Linode account . That way, it will be more difficult for attackers to gain access to your server. This extra layer of protection can be achieved with an app such as the Google Authenticator or Authy.


How to connect to your own VPN
If you followed the steps above, you already have your own VPN running and protected, as well as an .ovpn file in your possession. So it was time to connect to the VPN with OpenVPN . In this case, we will explain how to do it from an Android device. The only thing you will need is to have the .ovpn file in your Android storage and install the OpenVPN app.

Do you already have what it takes? Follow these steps to connect to the VPN:
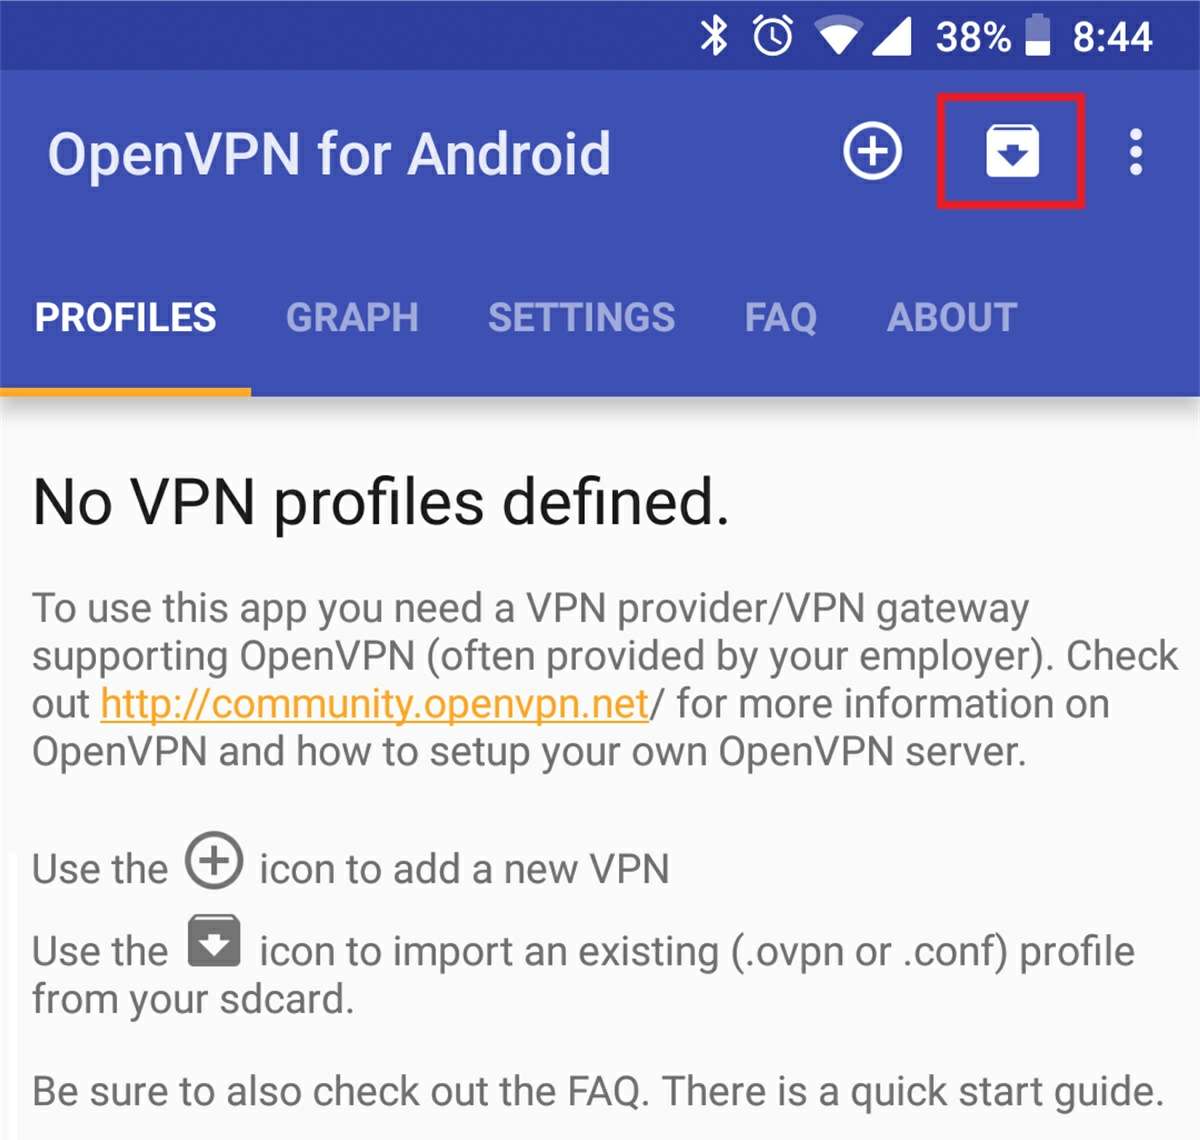
- Open the OpenVPN app and tap the import button (it’s at the top and has a box icon).
- Find the .ovpn file in your Android storage, select it, and then click Save.
- Now, on the main screen of the app, you will see that a new connection option appears. Press it and you will be connected to your own VPN .
That’s it! Start enjoying your VPN, doing all the tests you want. Remember that if something is wrong with the VPN, you can go to the VPS server tab in Linode and select Running> Reboot to restart the VPN. This is usually easy to fix bugs or unknown errors.
And if you don’t want to continue having your own VPN, simply go to Linode, select the VPN server, enter the settings and click on Delete Linode .
Anyway, that’s all you need to know when creating your own VPN. As you will see, doing this is simpler than it seems, although what you get is a basic VPN that is not as functional as the VPN service that companies offer. However, for certain uses, your own VPN can be very useful and much cheaper than third-party VPNs.